Stainless Steel Rivets...or Aluminium...Which to use?
I use Aluminium Rivets.
While both do not rust and the Stainless Rivets are shinier, I would recommend the Aluminium Rivets for one simple reason...They are easier to remove if you make a mistake.
Stainless Steel is hard on files. It dulls and wrecks them. You can actually melt the plastic from the heat generated simply filing them, trying to remove them.
They are also harder to set because the Stainless is harder than Aluminium. So the pressure needed to set them is greater than that needed for Aluminium. If you aren't careful...you can easily crack your parts.
There's nothing wrong with using stainless rivets. But you need to be aware that when setting them, you need to adjust your 'feel'.
Showing posts with label Rivets. Show all posts
Showing posts with label Rivets. Show all posts
Monday, November 20, 2017


Thursday, January 31, 2013
How To Tighten Rivets At Home
You dont buy a tool unless you plan to use it. Or unless you are like me and simply buy tools because you never know when you'll need it. I have tools I have only used once in 10 or 20 years even. But the moment I get rid of the tool...I'll need it.
For me a Hand Squeeze Riveter was a no brainer. For some people its an unjustified expense. And its not cheap. So I set to finding the easiest and cheapest way for everyone to save tighten their figures. I tried several methods. Made different tools and it doesnt get any easier/cheaper than this.
Tools: 1 small Ball Bearing. A standard BB will do.
A small flat piece of steel. A butter knife/table knife/steak knife
Butter/grease/honey or something similar.
I medium set of Pliers
1 vise
 Directions: Put a dab of butter/grease or whatever you use in the CRUSHED end of the rivet. Place the ball bearing on the crushed end of the rivet and lightly press down to seat the bearing on the rivet. The butter helps keep the ball bearing from falling out.
Place you knife of choice or any other thin flat piece of metal you have in the vise. I used my measuring spoon. Place the limb you wish to rivet, with the head of the rivet upon the flat surface of your knife blade. The ball bearing should be on top. The vise is used to hold the steel to free up your hands and make it less awkward. More talented people might be able to get away without one. I have a vise. So I use it.
 Using Pliers gently squeeze ball bearing and bottom of the flat piece of steel of your choice. Squeeze. Just a little. Dont overdo it. You need to get the feel of how much pressure you need to apply. Just squeeze a little bit and then check the movement. If its not enough, you can always squeeze it again. If you over squeeze you cant loosen the rivet. You would have to drill out the rivet and start over. The flat steel protects the head of the rivet from getting marked up by the pliers and the ball bearing does the same on the crushed side as well as it provides even pressure on the rivet.
Test Tightness. Repeat if necessary. Wipe of the butter and play. :-)
For me a Hand Squeeze Riveter was a no brainer. For some people its an unjustified expense. And its not cheap. So I set to finding the easiest and cheapest way for everyone to save tighten their figures. I tried several methods. Made different tools and it doesnt get any easier/cheaper than this.
Tools: 1 small Ball Bearing. A standard BB will do.
A small flat piece of steel. A butter knife/table knife/steak knife
Butter/grease/honey or something similar.
I medium set of Pliers
1 vise
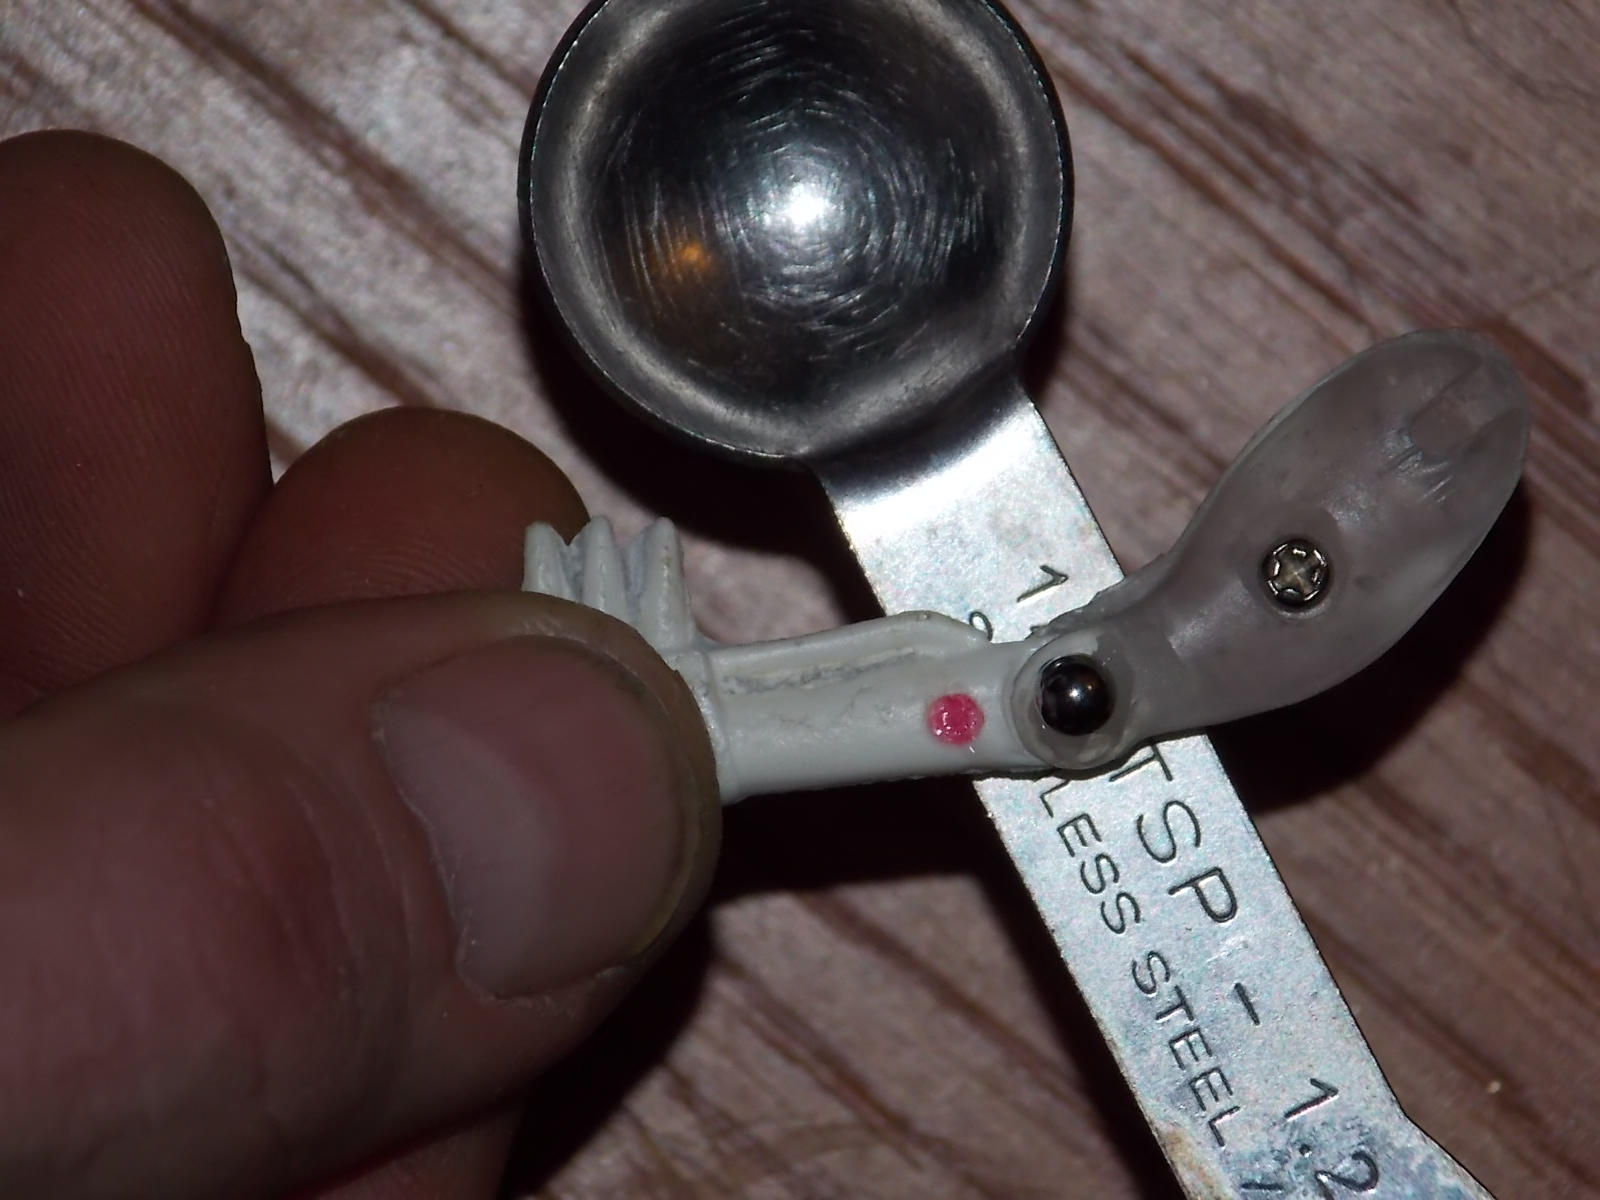
Place you knife of choice or any other thin flat piece of metal you have in the vise. I used my measuring spoon. Place the limb you wish to rivet, with the head of the rivet upon the flat surface of your knife blade. The ball bearing should be on top. The vise is used to hold the steel to free up your hands and make it less awkward. More talented people might be able to get away without one. I have a vise. So I use it.

Test Tightness. Repeat if necessary. Wipe of the butter and play. :-)
Riveting Knee Joints on 3 3/4" Micronauts
I use rivets. I like them. They strength the figure. Plastic pins wear and/or break. Have a floppy leg Antron? Or a Repto? Thank goodness for the tail. You can either find a parts lot and replace the parts and hope the ones you get are tighter or will be tighter when you put everything together. Or you can drill them out and install rivets. It Can be done but its a last resort.
After 35 years the plastic is brittle and even manually drilling with my fingers spinning the drill bit...There is no rhyme or reason. It either works or it shatters. Once the hole is drilled, putting a rivet in isnt a problem. But the drilling is.
 As a last resort if you have some spare legs to work with its actually worth it to try. It strengthens the figure like you wouldnt believe. I have a vintage Centaurus I did it to. I shattered 2 or 3 legs trying to drill it, but once it was drilled, she went together pretty good and is nice and firm. And since we are all accustomed to rivets in the arms/shoulders of our Microman figures, you actually dont even notice the rivets are there.
And considering how rigid this figure is now, I would rather have the rivets than not.
For those IN CANADA considering a Squeeze Riveter I...I cant believe I am saying this...Check Ebay first.
I went to several tool outlets and was informed at every one it would be 2-3 weeks for them to order it and the bill would have been between $250-$350. They had to order it. Order it? From where? From the US. Well shit I can do that myself. So I found a decent squeeze riveter for around $90 or $100 on ebay and after shipping/customs I saved at least $100.
Im not sure what US tool suppliers would charge, so for US residents you might want to check with a supplier first before hitting Ebay.
After 35 years the plastic is brittle and even manually drilling with my fingers spinning the drill bit...There is no rhyme or reason. It either works or it shatters. Once the hole is drilled, putting a rivet in isnt a problem. But the drilling is.

And considering how rigid this figure is now, I would rather have the rivets than not.
For those IN CANADA considering a Squeeze Riveter I...I cant believe I am saying this...Check Ebay first.
I went to several tool outlets and was informed at every one it would be 2-3 weeks for them to order it and the bill would have been between $250-$350. They had to order it. Order it? From where? From the US. Well shit I can do that myself. So I found a decent squeeze riveter for around $90 or $100 on ebay and after shipping/customs I saved at least $100.
Im not sure what US tool suppliers would charge, so for US residents you might want to check with a supplier first before hitting Ebay.
Thursday, July 1, 2010
Restoring Rigidity to 3 3/4" Micronauts
I wasnt sure how to title this post. I want it to get your attention.
Home casting is an imperfect art using imperfect methods to best duplicate injection molded parts that are near flawless. Unless one is willing to invest in equipment most casting is unavailable or the results will leave you wanting.
 One area that has intimidated me is the legs of the 3 3/4" action figure. The knee joint is a quirky yet precise mechanism. There are alot of variables involved in getting the knee joint to not just operate, but hold a pose. So I pulled out some rivets I had bought a while back when researching rivets for the 3 3/4" action figure. I took some garbage parts and even tho they didnt align, by grinding the mating surfaces flat and installing a rivet in the knee, I was able to salvage them. Well I could if I wanted to. But I wont. These are just test pieces.
 Really, there are so many pieces to the Centaurus figure, it is a difficult figure to replicate. By installing knee rivets, I have strengthened the knee joint and in fact the whole figure and have made the Centaurus a poseable figure no matter how much I 'play' with it. I have in fact solved a lot of issues faced by home casting by installing a knee rivet.
These photos are of test pieces. So they dont really look as good as it can. But originally these pieces would have been scrapped because of slight fitting issues. Installing a knee rivet overcame the deficiencies of home casting. Now that I know I can consistently achieve the results I want, this takes alot of the stress off of me during the casting process.
 It takes a bit of work to make sure the resin gets all the way into the little hole in the mold that makes the knee pin. One little tiny air bubble in here and the thigh is now a wasted cast piece because the knee pin collapsed. Ok...so file it smooth, drill a small hole in the knee for the rivet and install the rivet. This can even be done to vintage action figures.
Imagine...Repto's knees wont flop. He'll be able to stand without using his tail. You will be able to pose your vintage centaurus without using a stand. You hardly notice it is even there.
If you are interested in restoring the regidity to any of your figures, please email me at the blogs address gold_dober@yahoo.com I charge $10.00 US to rivet the 2 knees on a Micronauts style 3 3/4" action figure plus shipping. $25.00 for 3 or 4 figures.
I'll post some more pictures in the immediate future of knee rivets in more appealing colored parts so you can get the full effect.
Home casting is an imperfect art using imperfect methods to best duplicate injection molded parts that are near flawless. Unless one is willing to invest in equipment most casting is unavailable or the results will leave you wanting.


These photos are of test pieces. So they dont really look as good as it can. But originally these pieces would have been scrapped because of slight fitting issues. Installing a knee rivet overcame the deficiencies of home casting. Now that I know I can consistently achieve the results I want, this takes alot of the stress off of me during the casting process.

Imagine...Repto's knees wont flop. He'll be able to stand without using his tail. You will be able to pose your vintage centaurus without using a stand. You hardly notice it is even there.
If you are interested in restoring the regidity to any of your figures, please email me at the blogs address gold_dober@yahoo.com I charge $10.00 US to rivet the 2 knees on a Micronauts style 3 3/4" action figure plus shipping. $25.00 for 3 or 4 figures.
I'll post some more pictures in the immediate future of knee rivets in more appealing colored parts so you can get the full effect.
Subscribe to:
Posts (Atom)