Fortunately we arent dealing with a bank. The missing sheets have been found and will soon be here. As soon as they arrive I will be posting them. The seller was extremely nice about it. Im so relieved.
Im sure most of you have seen them already on ebay, but I'll give you a closer look. There are some very ccol shots you just dont see these days. Remember these are the salesman sets. So there might be some photos that might vary from the actual final product. At least thats what I am hoping.
Just like the German Airfix Toy Brochure. You know the one in every Micronauts Toy set. Well I just picked up one off ebay that features a WHITE Baron Karza and a Transfer Fortress in it. After checking around it was told to me that it was probably more a matter of parts missing for a photo shoot and so they adlibbed as opposed to a suggested alternate color scheme.
Sunday, December 19, 2010
Saturday, December 18, 2010
Copper Chrome Force Commander
Im still dieing to put this beside the Gold Force Commander and take some pics. However its late and Im tired, so it will have to wait till tomorrow for the dual pic. Plus it will be the first chance this week I will have had to take some daylight pictures. So I will take pictures of the two of them tomorrow afternoon. By 5pm its already dark out now.
 But I was able to get a good picture nonetheless of the Chrome Copper Force Commander.
Now that these have been done. I am more determined than ever to get a metalizer and do this myself. I know the theory behind the processes and having never chromed a piece myself, it was my suggestions and recommendations that figured out for the chromer how to hold these in a manner that would allow them to be able to chrome them without damaging them.
Being a machinist for 25 years has only made me more of a perfectionist and I truly believe that I can do a better job because I am more familiar with these figures.
You'll notice the pooling of color in the eyes. Also, the coloring is slightly inconsistent. Its still a fantastic looking figure none the less, but it could have been better. The reason is the chromer is after all this time and a trip down to see him, is still unfamiliar with the figure. He has no knowledge of the Micronauts or other figures in the line so he doesnt know what is really important and whats not.
I had hoped to have a metalizer this year, and probably would have if I had not bought this new truck. So next year Im getting rid of the truck for a cheaper one that will allow me to be able to afford a small metalizer so that I can do this type of work myself. All in all, I had 14 magno figures chromed plus the Palisades Baron Karza/Andromeda set. The cost of chroming these figures alone would have bought a small metalizer. Considering how much chroming I want to do for myself makes this a practical purchase plus I will then be able to provide this as an additional service.
It makes a huge difference when you get someone to do something and they are familiar with the pieces. Its like asking Robert Bateman to paint a picture of a Micronaut figure. He is unfamiliar with the line and in all likelihood wont be able to grasp the essence of the figure in the painting as say Ken Kelly would or Dave Doorman.
I can do a bit better of a job and I know it. If my advice helped them, then maybe I should seriously consider just doing it myself.
Friday, December 17, 2010
Copper Chrome King Atlas

I have gone with a simple and common color theme for all of the chrome magnos I have made.
Baron Karza : Black Hilights
King Atlas : Black Hilights
Force Commander : White Hilights
Emperor : Silver Chrome Hilights
I had the black hilights in my parts organizer so they were easy to get to. Tomorrow, I will go through the closet and dig out my last Red Clear Force Commander and strip the white hilights from it and use it in the Copper Force Commander. Yes, I could easily make the chest hilights by casting them. But I am sparing no expense for these chromed magnos. I want injection molded parts only for these figures. The remaining parts from the Red Clear Force Commander will be recycled into a red clear with Black hilights Force Commander. I will have 3 of these when I am finished.

The Copper Chromed Emperor and the Blue Chrome Emperor will be completed in roughly 8-10 weeks. I have yet to send the hilights for Silver chroming. So it makes no sense to assemble the figure till I need to.
You may notice that there are no back packs and rockets right now. There was an issue with the backpacks and they have been sent back for touch up work. I expect them back in a few weeks.
Thursday, December 16, 2010
Copper Chrome Baron Karza
Well its another late night. I had a bit of an issue when I misplaced my Purple Chrome Emperor. I wanted to put the final purple chrome pieces with it so I wouldnt lose them, until I got the silver chrome hilights to assemble him...2 hours later he was located.
So that delayed me. But here he is in all his glory. Copper Chrome BK meets Gold BK. Im still learning how to use this camera and working with lighting after sundown. These guys are very hard to get a good photo. This is the only photo that turned out well enough. The others the lighting was off and the pictures were too dark to reflect the true color.
I think the Gold BK has met his match. But Im biased. I still need to put his rockets on, but Im way too tired right now.
Wednesday, December 15, 2010
Copper Chrome
Well its all catching up with me. I didnt get to sleep till 2 am and was back up at 6:30. Im about ready to fall asleep and I know by 10 pm I'll be wide awake. So I havent got a completely assembled Copper Chrome figure put together yet.

But I promised some pics today, so I took a pick of one of the chest pieces so you can see how it turned out.
 I will be pulling the white hilights from a red clear Force Commander and installing them into the Copper Chrome Magno. I bought 4 Red Clear Force Commanders when I had the chance a few years ago knowing I needed them for this project. I would have bought 5, but YEARS ago, I bought the Palisades Red Clear FC BAG O PARTS auction. No FC head, but everything else was there. So I used that one to make a red clear with white Baron Karza.
Im dieing to put my Gold Force Commander up beside the Copper Chrome FC and post a pic of them together. Expect that in the next day or two.

But I promised some pics today, so I took a pick of one of the chest pieces so you can see how it turned out.
Im dieing to put my Gold Force Commander up beside the Copper Chrome FC and post a pic of them together. Expect that in the next day or two.
Sunday, December 12, 2010
Blood Worm Membros
Sometimes you get stupid and sometimes you get lucky. This was the one time I got both.
There was a multi action figure ebay auction. In this auction was a white Emperor among other figures. It was what I was after believing I didnt have one. However at the time, it had been a long time since I had been through the closet and I didnt have an inventory list.
The seller had a few other things in the auction. Including a Hero Factory Space Glider still in its baggie. The seller thought this was the diamond in the rough figure. I have 265 of those. 2 cases yet unopened. There was another figure in this lot. From the picture it looked like a black Membrose. Yawn. Back to the Grey or off white Emperor. That was the prize in this lot. SO I thought.
I won the auction. When it arrived, I stared going through the closet to put it away. WHATS THIS?!?!? I already had an off white Emperor. I didnt need to buy this auction at all. If only I wasnt so stupid and had inventoried my collection.
 Hold on...WTF...Whats this??? In the auction, the picture was dark in the one area and didnt reflect the actual colors of one of the figures. Membros. In the photo he looked like a typical all black Membros. But thats not what this was. This is an official unofficial Palisades run off. Palisades didnt make any red clear Membros. Yet this Membros has Red Clear Arms and clear red cuffs for the accessories. I later found out that there were less than 10 of these figures made and at least half were mistakenly shipped out with the rest of the production figures. And here I had recieved it by bidding on an auction by mistake. Had I known I already had an off white Emperor, I would never have bid on the auction. Further digging revealed it to be called "The Bloodworm Membros"
Altho the cover photo is a little dark, you can clearly see the clear red Membros arms and Cuffs and the figure is MOC.
Stupid and Lucky. Both at the same time. Usually its just the Stupid part, but its nice to be lucky every once in a while. :~)
There was a multi action figure ebay auction. In this auction was a white Emperor among other figures. It was what I was after believing I didnt have one. However at the time, it had been a long time since I had been through the closet and I didnt have an inventory list.
The seller had a few other things in the auction. Including a Hero Factory Space Glider still in its baggie. The seller thought this was the diamond in the rough figure. I have 265 of those. 2 cases yet unopened. There was another figure in this lot. From the picture it looked like a black Membrose. Yawn. Back to the Grey or off white Emperor. That was the prize in this lot. SO I thought.
I won the auction. When it arrived, I stared going through the closet to put it away. WHATS THIS?!?!? I already had an off white Emperor. I didnt need to buy this auction at all. If only I wasnt so stupid and had inventoried my collection.

Altho the cover photo is a little dark, you can clearly see the clear red Membros arms and Cuffs and the figure is MOC.
Stupid and Lucky. Both at the same time. Usually its just the Stupid part, but its nice to be lucky every once in a while. :~)
Wednesday, December 1, 2010
Wasnt That A Party!!!
Well the 2010 Grey Cup has come and gone.
MAN!!! What a party. Tailgate parties/hot tub parties and of course the typical keg parties were everywhere. The 2010 Grey Cup was the largest and most successful party to date. Of course that was due to all the Saskatchewan fans who basically turned Edmonton Alberta into Edmonton Saskatchewan.
It was sold out. I was cheering for both teams, But I am an Anthony Calvillo fan. He's the quarterback for the Montreal Allouettes. A future Hall of Famer. So I bought a Montreal jersey. Bring your sense of humor. WOW was I out numbered. VERY outnumbered. Someone had to cheer for Montreal and Im a glutton for punishment...It was the best time I have had in a long while.
Prime Minister Stephen Harper was a few rows down below me. I spent the first quarter taking pictures of the costumes people were wearing. I'll say this...Saskatchewan fans are very loyal and playful. They are without a doubt the best and noisiest fans in the CFL.
At the beggining of the game the Snowbirds came in formation. I thought I was gonna lose my mind. You could see them approach on the Jumbotron. But what wasnt on the Jumbotron, were the 2 CF-18's that came in so low, I swear they actually flew into the stadium, they were that low. I lost my hearing. It was so FN loud. Of course they were so quick, I couldnt get a picture. And it was so cold, my camera kept acting up. I had to keep it warm by stuffing it down my pants or it wouldnt work.
The Halftime entertainment featured BTO. Man, those boys can still crank it out. They took a few pages from Motley Crue with the pyrotechnics. The cold froze the zoom feature so I didnt get any close ups. Bummer. Earlier pregame entertainment featured 5 other bands including Great White. The even had a zip line for people to try. It was very cool. I tried to get a picture of this one girls cleavage, but Gumby kept sticking his head in between her boobs everytime I went to take the picture. I should have given him the camera.
This was the second year in a row that these 2 teams met in the Grey Cup. Montreal has won both times. I picked Montreal to win because Athony Calvillo is the master of the clock. He doesnt panic and knows how to use the clock to his advantage. While the game was closer than I expected it to be, Montreal did win. But it was close. It took a last minute interception for Montreal to seal the deal.
It'll be another 8 or 10 years before we see another Grey Cup here in Edmonton. And Im gonna be there. Im keeping these season tickets. It was worth it.
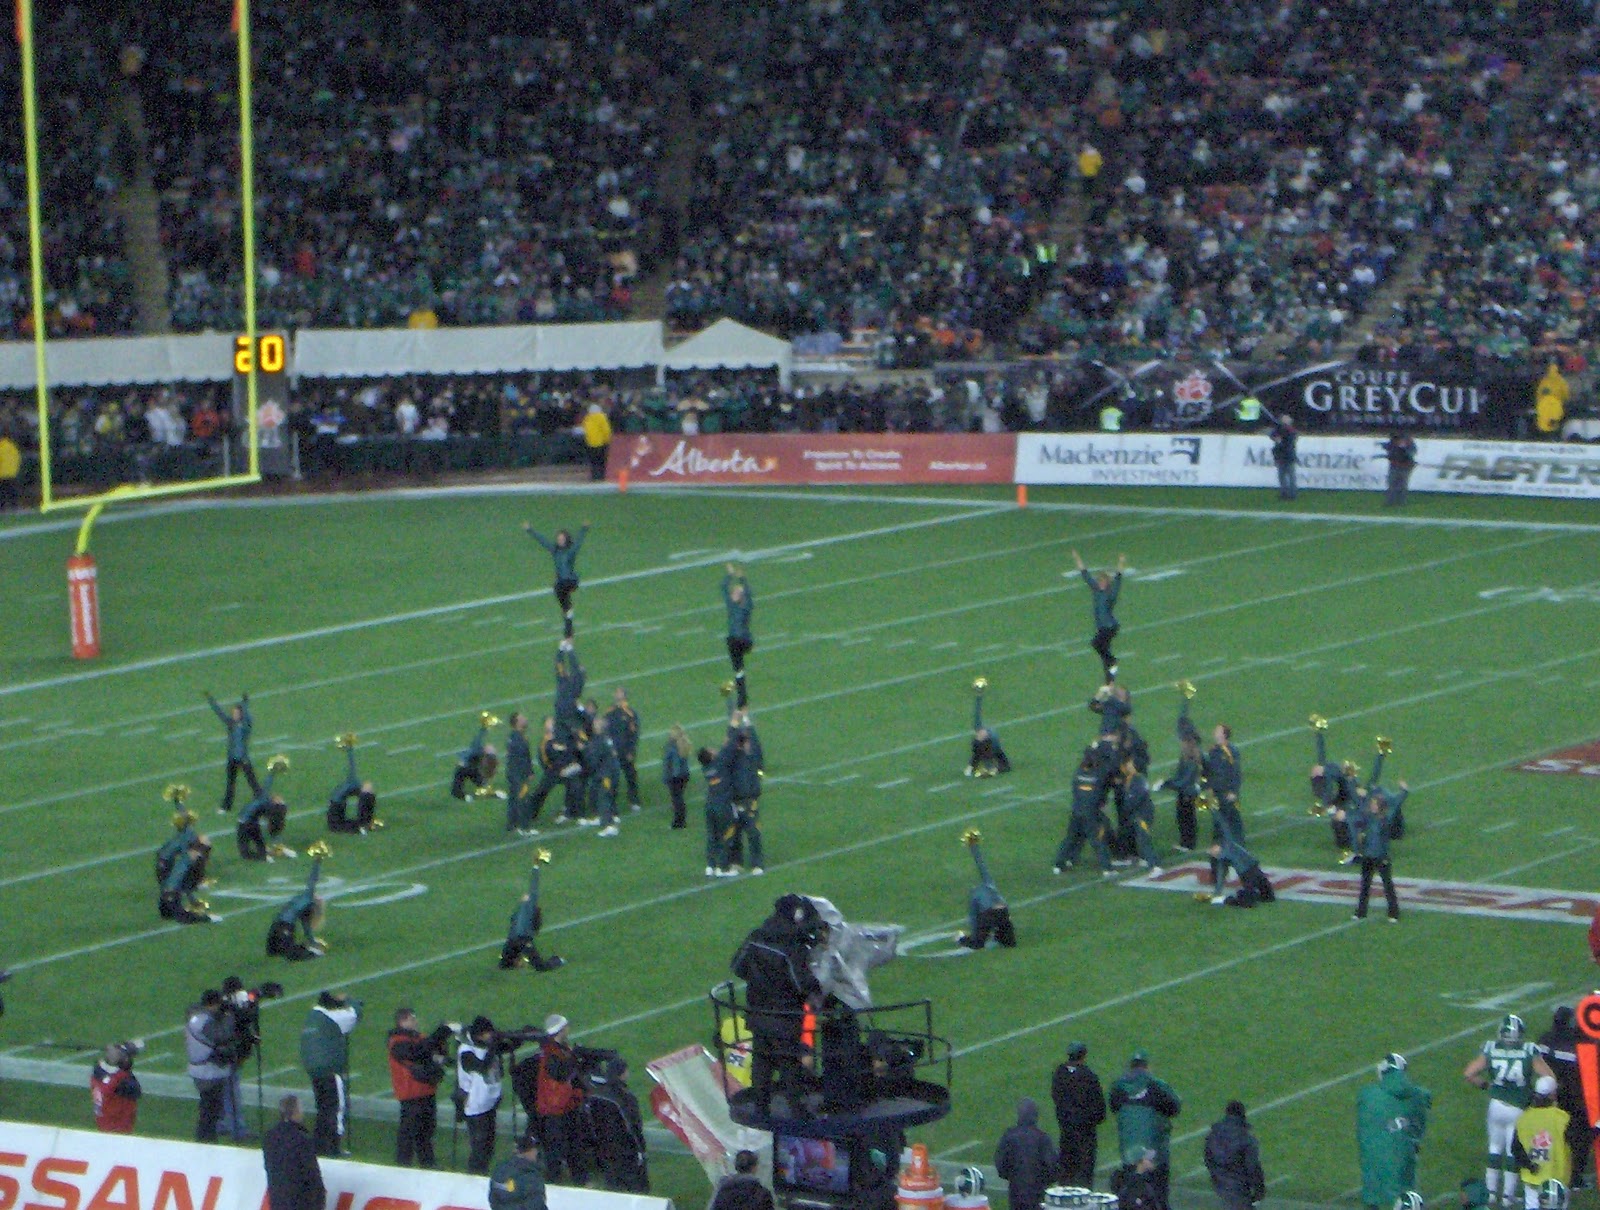
Altho the Edmonton Eskimos really sucked this year, All the teams were represented in some form by their cheerleaders. And the Edmont Eskimo Cheer Team proved that they are without a doubt THE BEST in the league. While most teams have strictly Cheerleaders, The Eskimos also have men on the Cheer Team. This allows for more acrobatics. I mean man can they throw those cheerleaders high!!!


Moses is a Saskatchewan Fan!
 CLEAVAGE SHOT!!!

 BTO-Bachman Turner Overdrive is Taking Care Of Business!!!

 This stupid mascot kept throwing his head forward and back. I lost my lunch laughing so hard. All the plummage would flare up when he did it. It was hilarious.
 Fireworks or rather some of them.

 Edmonton Eskimo Cheer Team.

 More BTO !!! YEAH BABY!!!
 The Jumbotron.
 SO here's a few pics of the Grey Cup and some of the costumes I managed to get pictures of. Just click on them to enlarge.
There arent any pictures of any Montreal Fans because...Well there werent very many. Or at least very few dressed up. I mean it when I say this game was dominated by Saskatchewan fans. The attendance record was set by Edmonton VS Saskatchewan last year and eclipsed by this Grey Cup game.
Now lets get back to making more Action Figures!!!
MAN!!! What a party. Tailgate parties/hot tub parties and of course the typical keg parties were everywhere. The 2010 Grey Cup was the largest and most successful party to date. Of course that was due to all the Saskatchewan fans who basically turned Edmonton Alberta into Edmonton Saskatchewan.
It was sold out. I was cheering for both teams, But I am an Anthony Calvillo fan. He's the quarterback for the Montreal Allouettes. A future Hall of Famer. So I bought a Montreal jersey. Bring your sense of humor. WOW was I out numbered. VERY outnumbered. Someone had to cheer for Montreal and Im a glutton for punishment...It was the best time I have had in a long while.
Prime Minister Stephen Harper was a few rows down below me. I spent the first quarter taking pictures of the costumes people were wearing. I'll say this...Saskatchewan fans are very loyal and playful. They are without a doubt the best and noisiest fans in the CFL.
At the beggining of the game the Snowbirds came in formation. I thought I was gonna lose my mind. You could see them approach on the Jumbotron. But what wasnt on the Jumbotron, were the 2 CF-18's that came in so low, I swear they actually flew into the stadium, they were that low. I lost my hearing. It was so FN loud. Of course they were so quick, I couldnt get a picture. And it was so cold, my camera kept acting up. I had to keep it warm by stuffing it down my pants or it wouldnt work.
The Halftime entertainment featured BTO. Man, those boys can still crank it out. They took a few pages from Motley Crue with the pyrotechnics. The cold froze the zoom feature so I didnt get any close ups. Bummer. Earlier pregame entertainment featured 5 other bands including Great White. The even had a zip line for people to try. It was very cool. I tried to get a picture of this one girls cleavage, but Gumby kept sticking his head in between her boobs everytime I went to take the picture. I should have given him the camera.
This was the second year in a row that these 2 teams met in the Grey Cup. Montreal has won both times. I picked Montreal to win because Athony Calvillo is the master of the clock. He doesnt panic and knows how to use the clock to his advantage. While the game was closer than I expected it to be, Montreal did win. But it was close. It took a last minute interception for Montreal to seal the deal.
It'll be another 8 or 10 years before we see another Grey Cup here in Edmonton. And Im gonna be there. Im keeping these season tickets. It was worth it.
Altho the Edmonton Eskimos really sucked this year, All the teams were represented in some form by their cheerleaders. And the Edmont Eskimo Cheer Team proved that they are without a doubt THE BEST in the league. While most teams have strictly Cheerleaders, The Eskimos also have men on the Cheer Team. This allows for more acrobatics. I mean man can they throw those cheerleaders high!!!


Moses is a Saskatchewan Fan!


There arent any pictures of any Montreal Fans because...Well there werent very many. Or at least very few dressed up. I mean it when I say this game was dominated by Saskatchewan fans. The attendance record was set by Edmonton VS Saskatchewan last year and eclipsed by this Grey Cup game.
Now lets get back to making more Action Figures!!!
Wednesday, November 17, 2010
A Near Death Experience
I came home from work. I wanted to hurry up and get some casts made. I went into the basement where unfortuneatley I have to keep Sable as she has been ripping the house to shreds when alone. There is the crawl space and the laundry room. The crawl space goes under half the house and opens up in to the laundry/furnace room and on the other side of the basement under the stairs. There is a wooden baby gate to block it off. There is a little hallway from under the stairs to the door leading upstairs and beside it the door to the laundry room and another straight ahead into the finished basement where I am doing my casting. I keep this door closed AT ALL TIMES as do I my collection room.
THANKFULLY!!! Sable destroyed the baby gate, chewed the wood to splinters, pulled all the clothes off the dryer and some that were hanging up. She pulled up and destroyed the carpet to the point I couldnt open the main door into the basement hallway. She destroyed home 45mm reel movies and worst of all...
In the basement hallway is my grandmothers old Singer Sewing machine from 1912 I believe...could be as late as 1917. Its on there I just forgot. But when its down it makes a nice little table. And its the perfect size for my Chess Set. While all the doors were closed, Sable went around under the stairs destroyed the baby gate and now had complete access to the basement hallway. But thats as far as she could go. And as far as she needed to go in order to get to My Custom Micronaut Chess Set.
Black Membros (Bishop) and The Black Defender (King) were totalled beyond repair. The bases will have to be repolished to see if I can get all the marks out. If not, I will have to make two more. The figures will have to be replaced. I still havent found Membros head. The Galactic Defender can probably be salvaged for a few parts.
Yup...It was a near death experience. She doesnt know how close she came. I have never owned such a stubborn and destructive dog such as this in my life. Never let anyone else pick out your dog or give you one as a gift. Picking a dog is just as important as picking a partner. Now to see what I can do about the carpet. Shit.
One More Reason To LOVE Sprue Molds
As if my love affair for sprue molds needed more reasons to keep me happy.
Here is one more reason to use a sprue mold if you have the choice. Smush Mold...resin in 1/2 of the mold and resin in the other half of the mold. Smush em together, pressurize if possible and cure.
How many things can go wrong here? You can trap air in the mold. You inadvertently orient the mold wrong and in your panic, all the resin runs out. You wait too long to put the 2 halves together and the resin has already started curing and now you cant get the 2 halves of the mold tightly together giving you an oversize and distorted cast. Once cast, if there is an air bubble somewhere, its very hard to fix.
Those are the most common things to go wrong. Here's is how a Sprue Mold overcomes these issues.
The mold is already together when you pour the resin. Guaranteeing you a close to accurate cast size. So your biggest worry here is The Shrinkage Rate. Expect 3%-5% of total size lost. Since the Mold is preassembled prior to pour, there is no chance of improperly orienting the cast halves.
But here is my favorite. A sprue mold relies on the basic concepts of physics. Gravity. gravity pulls things down. So when you pour a cast, gravity pulls the fluid resin down. It will follow the channels pushing the air out in front of it. IF something does go wrong, its usually at the end of a pour.
Recently after I poured a sprue mold, when I took it out of the pressure pot, the air pressure had pushed the resin deep into the mold forcing the air out via the channel. I had thought the mold full when I put it in the pot only to find that because of the air pocket the cast was no incomplete. There wasnt enough resin poured into the mold now.
Because of the expereince I have had curing 2 separate colors together, I simply made a little bit more resin. Carefully put the mold back together with the cast still in it and poured the resin into the mold ontop of the previous cast. It filled it in beautifully. You wouldnt know if I didnt tell you. And if I didnt know, I wouldnt be able to tell. Its a PERFECT fix. Try doing that with a smush mold. Most likely you would scrap the piece and try to make a new one.
Also, in areas that might trap air in the cast, you simply create (cut) a small air pocket where the problem is. It pushes the air up into the pocket so that the resin can fill in the mold.
Yup, there are so many plusses to sprue molds. But Smush molds are still easier and involve less trimming and are VERY goos for hi detail parts. But you will have more scrap if you arent careful.
Sunday, November 7, 2010
Resin Mixing Ratios
Every resin has a mixing ratio. The ratio is how much of Part A to mix with how much of part B.
And then there is the fine print. The wuh? Yes...the Fine Print. Fine Print is what we dont see because we think we know it all. And then all of a sudden everything goes kerfluey and we dont know why. Because we didnt see and read the Fine Print.
The Fine Print says...Mixing Ratio "X amount" of A: "X amount" of B......and this is the important part...By Volume "X amount A: "X amount" B by Weight.
And some resins, MOST in fact have 2 ratios. 1 ratio is for WEIGHT and 1 ratio is for VOLUME. The weight ratio is the one that is usually the weird ratio. 100:80 or 100:90. The volume ratio is usually closer to a 50/50 or 1:1 ratio. Last week or so when I first made the Roboid molds I was having issues with my urethane resin. Why? because I was confusing the volume and weight ratios. I was trying to measure the weight and instead adjusted the volume and it impacted the resin in a negative way.
You cant measure weight with measuring spoons. Measuring spoons measure volume. And thats exactly what I did...or attempted to do.
Since I dont have a scale, I have been measuring by volume. When you get the volume ratio right, the weight ratio will be correct and visa versa.
Monday, October 25, 2010
Thank You Bry
Homeworld wishes to send out a big THANK YOU...a HUGE THANK YOU to Bry Wilkinson for his part in the Pass Around Project. There are a few more people as well, but Im not quite sure who is all involved. So I do apologize for not mentioning anyone else. Im also not sure how others feel about having their names blogged.
But Bry was instrumental in getting me to do this project. I originally turned it down. At the time I didnt think I had the required skills and practices of casting to do a proper job. But by the time I recieved the parts, I had the right equipment and sufficient confidence that I knew I could do it. All I needed was the time. I know I have had this figure here since february of this year, so he has been quite awhile without his figure. A few years at the very least. I think the only person left to cast this figure now is him.
So once again, Thank You Bry for letting us use your figure and to the others who have also so graciously lent their parts to this project, Im sorry I dont have your names. But Thank you all for your generosity and your patience. This is awesome.
Thursday, September 30, 2010
Tankless Compressor
Our garbage bin at work is a gold mine. The things people throw away. As you know I got my compressor from there. Well now someone has thrown a substantially quieter Tankless Compressor away. It works great.
A tankless compressor is exactly that...tankless. It doesnt store air is very lightwieght and compact. Its smaller than your average vacuum cleaner. It usually only pumps up to 100 psi. We need 35-50 psi. More than sufficient. It can be used for the exact same things as a simple compressor or for any application requiring 100psi or less.
So Im running the compressor back out to the garage and now have a tankless compressor to use in the house. Hmmmm...now if I had a second pressure pot, I could really stack myself up with work. lol.
Saturday, September 25, 2010
Pressure Pot Maintenance Advice
Im known for over tightening things. Everything from pop bottles to nuts and bolts. Its something I have to be careful of. Its a natural habit for me to make sure things are snug.
When you overtighten things, as with metal fasteners, you are creating stresses and strains. You are squishing the threads together. Eventually the metal will tear a little bit and start to gall up and tear in the thread. This makes it harder and harder to turn till eventually it siezes up.
If you have the same issue as I do and even if you dont, I recommend putting some anti-sieze compound of some type on your lid clamp down threads of your pressure pot. I use a nickel based antisieze. There are lots out there all of them just as good as the other. You have metal turning against metal. You wouldnt run your engine without motor oil. This is exactly the same. They sieze. Just the results of not using anti sieze are alot less traumatic and costly than running a motor without oil.
You'll be extending the life of your pressure pot substantially.
Monday, August 23, 2010
Field Medic Chiron is Founded in Greek Mythology
I would like to thank Niko Simonson. It turns out Niko is quite up to date on his history. After seeing the Field Medic he thought it was inspired by "Chiron". When questioned about this he gave a quick background. Bry then pulled a wikipedia. Thanks also to Bry for forwarding it to me.
But it appears that The Centaur Field Medic is founded in Greek Mythology. I decided to make this figure in white/red because it seemed to be a good place to start. It seemed a good partner to the Time Medic once I got into it. Now I find out I am not quite as original as first thought. Who knew? Who says collecting toys isnt educational.
 It appears the Centaur Field Medics actual name is Chiron.
"In Greek mythology, Chiron (also Cheiron or Kheiron) (Greek: Χείρων; "hand") was held to be the superlative centaur among his brethren. Like the satyrs, centaurs were notorious for being overly indulgent drinkers and carousers, given to violence when intoxicated, and generally uncultured delinquents. Centaur were also wild and lusty. Chiron, by contrast, was intelligent, civilized and kind. He was known for his knowledge and skill with medicine."
"According to an archaic myth he was sired by Kronos (Cronus) when he had taken the form of a horse and impregnated the nymph Philyra. "
"Myths in the Olympian tradition attributed Chiron's uniquely peaceful character and intelligence to teaching by Apollo and Artemis in his younger days."
"Ironically, Chiron, the master of the healing arts, could not heal himself, so he willingly gave up his immortality. He was honoured with a place in the sky, for the Greeks as the constellation Centaurus."
 "Chiron appears on the cap badge of the Royal Army Veterinary Corps and also appeared on a similar badge worn by the Royal Canadian Army Veterinary Corps."
But it appears that The Centaur Field Medic is founded in Greek Mythology. I decided to make this figure in white/red because it seemed to be a good place to start. It seemed a good partner to the Time Medic once I got into it. Now I find out I am not quite as original as first thought. Who knew? Who says collecting toys isnt educational.

"In Greek mythology, Chiron (also Cheiron or Kheiron) (Greek: Χείρων; "hand") was held to be the superlative centaur among his brethren. Like the satyrs, centaurs were notorious for being overly indulgent drinkers and carousers, given to violence when intoxicated, and generally uncultured delinquents. Centaur were also wild and lusty. Chiron, by contrast, was intelligent, civilized and kind. He was known for his knowledge and skill with medicine."
"According to an archaic myth he was sired by Kronos (Cronus) when he had taken the form of a horse and impregnated the nymph Philyra. "
"Myths in the Olympian tradition attributed Chiron's uniquely peaceful character and intelligence to teaching by Apollo and Artemis in his younger days."
"Ironically, Chiron, the master of the healing arts, could not heal himself, so he willingly gave up his immortality. He was honoured with a place in the sky, for the Greeks as the constellation Centaurus."

Monday, July 26, 2010
Smush Molds Vs Sprue Molds - A WINNER!!!
Havent I had this post before? Yes...but I'm always thinking. Especially when I have issues. And this post about Shrinkage Rate got me thinking...
Some of my pieces are bigger than they should be. Again, these are silicone molds, not steel. Pressure can distort your mold and cast. And some of these pieces being bigger are causing fitting issues. Whats up?
And then it hit me...Smush molds DO NOT give a true cast. It may look close, but it will invariably always be bigger. When there is a 3%-5% shrinkage rate, how is this possible? With "Smush Molds" you have exactly that. 2 halves of the mold are filled and then smushed together. NOW...my guess is, you have slightly overfilled the mold cavity. So when you put the 2 mold halves together you are forcing the mold cavity to try and hold as much of the resin as possible. And slightly distorting your mold and cast piece. The "extra" resin get forced into the only available space left...The space in between the mold. This then separates the mold ever so slightly and keeps the mold from fully being closed and gets added to the cast piece thickness.
Oh it isnt much...but it can be. Maybe only .006"...I had one piece that was .033" thicker.
With a "Sprue Mold", the mold is already together. The resin isnt "stressed" into any cavities. There is no real pressure put on the mold so there is much less distortion. Much like water running into a crack. And because of this, you WILL then fully be able to notice your 3% Shrinkage Rate.
So...
IT IS IN MY OPINION THAT...While smush molds require less work at the mold stage and are easier to make and use...And that they do allow for parts with greater detail to be made much easier, SPRUE MOLDS GIVE A TRUER MORE ACCURATE CAST.
Saturday, July 24, 2010
Shrinkage Rate
What is "Shrinkage Rate? " Is it important?
Shrinkage rate is the amount a cast will deviate usually in a descending format from the original master. When you make a cast inevitably it will shrink. Engineers and scientists and people with lots of signed pieces of paper on their walls have determined that there is roughly a 3% -5% Shrinkage Rate for resins.
And I say "POPPYCOCK!!!" I dispute this based on 1 thing and 1 thing only...imperfection.
Not to be arrogant and not to cause trouble. Ever here of a joke that goes...what 10 000 lawyers at the bottom of the ocean? A good start. Well next in line are Engineers. Why? Because 99% of Engineers have never been outside of their office and seen people putting their calculations to work. In todays imperfect world their is only one constant. Their is only one thing in life that IS perfect. Its math. Numbers are beautiful. There is no grey. Only black and white. Right or wrong. And you can make numbers do whatever you want them to. Their only flaw is the people using them.
On paper...ON PAPER...everything looks good. Paper doesnt have any factors. No outside influences or interferences. Paper doesnt have "variables". In the real world, there is EVERYTHING fighting against you. I did construction. Sheetmetal. Man... Everyones blueprints were based on them being the first ones on site. Well now I have to work around the electricians work or this beam got missed and is in my way...lots of little things. According to the blueprint everything fit fine. Um...yeah.
Engineers are the pain in my ass.
The same applies to casting. You can say there is a 3%-5% shrinkage rate. Sure. Based on WHAT? Is that for 2 tablespoons of mixed resin or 2 cups or 2 gallons? Whats the temperature outside? Hows the humidity? How big is the actual piece you are making? AND THE BIG QUESTION>>> How much pressure are you putting on the mold halves when casting? How far above sea level are you if at all? What method(s) are you using to cast? Smush? Sprue?
These are soft silicone molds...not steel injection molds. There is give and play in the mold. You can squeeze and flatten the mold if too much pressure is used. The mold can separate and the pieces can ACTUALLY GET BIGGER if not enough pressure is put on the mold halves. So where is the shrinkage rate then?
These are important things to consider. And thats why sometimes the pieces need to be fitted. Because shrinkage rate is based on perfect conditions. We live in a imperfect world.
Monday, July 19, 2010
Tools

Dollar short and a Day late. So I just came home from searching the town. Mr. Schultz showed me exactly what I was looking for. And I had something. A ratchet style small tap handle. Except it couldnt handle drill bits under .125" I finally found whatI was looking for. To help me drill my holes and still retain feeling in my fingers. And its called a jewelers drill. Various makes and models and sizes I suppose from what I saw. Capable of holding even a .010" drill bit. So I was sold. However I had to haul my ass out of the hobby store real quick when I saw their Hot Wheels display. Hot Wheels is now making Monter Bikes...SUHWEET!

Thursday, July 1, 2010
Enigma Force
As a change or maybe to showcase, from time to time, Homeworld will switch up pictures on our Cover. I for the most part only use photos I have taken.
The current cover for Homeworld is a Robert 'Droid' work I commissioned from him. It was one of 3 he made and this was the one I chose. This photo "IS" the main or default photo for Homeworld entitled ENIGMA FORCE. So after I have showcased something on the cover, this will be the cover after the showcase has run its course.
If you have a photo of something Micronaut/Casting related and would like it showcased, feel free to ask. If it is suitable I could very well be persuaded to load it up. :~)
Restoring Rigidity to 3 3/4" Micronauts
I wasnt sure how to title this post. I want it to get your attention.
Home casting is an imperfect art using imperfect methods to best duplicate injection molded parts that are near flawless. Unless one is willing to invest in equipment most casting is unavailable or the results will leave you wanting.
 One area that has intimidated me is the legs of the 3 3/4" action figure. The knee joint is a quirky yet precise mechanism. There are alot of variables involved in getting the knee joint to not just operate, but hold a pose. So I pulled out some rivets I had bought a while back when researching rivets for the 3 3/4" action figure. I took some garbage parts and even tho they didnt align, by grinding the mating surfaces flat and installing a rivet in the knee, I was able to salvage them. Well I could if I wanted to. But I wont. These are just test pieces.
 Really, there are so many pieces to the Centaurus figure, it is a difficult figure to replicate. By installing knee rivets, I have strengthened the knee joint and in fact the whole figure and have made the Centaurus a poseable figure no matter how much I 'play' with it. I have in fact solved a lot of issues faced by home casting by installing a knee rivet.
These photos are of test pieces. So they dont really look as good as it can. But originally these pieces would have been scrapped because of slight fitting issues. Installing a knee rivet overcame the deficiencies of home casting. Now that I know I can consistently achieve the results I want, this takes alot of the stress off of me during the casting process.
 It takes a bit of work to make sure the resin gets all the way into the little hole in the mold that makes the knee pin. One little tiny air bubble in here and the thigh is now a wasted cast piece because the knee pin collapsed. Ok...so file it smooth, drill a small hole in the knee for the rivet and install the rivet. This can even be done to vintage action figures.
Imagine...Repto's knees wont flop. He'll be able to stand without using his tail. You will be able to pose your vintage centaurus without using a stand. You hardly notice it is even there.
If you are interested in restoring the regidity to any of your figures, please email me at the blogs address gold_dober@yahoo.com I charge $10.00 US to rivet the 2 knees on a Micronauts style 3 3/4" action figure plus shipping. $25.00 for 3 or 4 figures.
I'll post some more pictures in the immediate future of knee rivets in more appealing colored parts so you can get the full effect.
Home casting is an imperfect art using imperfect methods to best duplicate injection molded parts that are near flawless. Unless one is willing to invest in equipment most casting is unavailable or the results will leave you wanting.


These photos are of test pieces. So they dont really look as good as it can. But originally these pieces would have been scrapped because of slight fitting issues. Installing a knee rivet overcame the deficiencies of home casting. Now that I know I can consistently achieve the results I want, this takes alot of the stress off of me during the casting process.

Imagine...Repto's knees wont flop. He'll be able to stand without using his tail. You will be able to pose your vintage centaurus without using a stand. You hardly notice it is even there.
If you are interested in restoring the regidity to any of your figures, please email me at the blogs address gold_dober@yahoo.com I charge $10.00 US to rivet the 2 knees on a Micronauts style 3 3/4" action figure plus shipping. $25.00 for 3 or 4 figures.
I'll post some more pictures in the immediate future of knee rivets in more appealing colored parts so you can get the full effect.
Saturday, June 19, 2010
ORIGINAL Dark Assassin Molds


But here it is the Original Molds used to make the Sword for the Dark Assassin. WOW!!!
Thursday, June 10, 2010
Edmonton Eskimos '10 Grey Cup
A friend of mine told me about the Superbowl he went to. I couldnt believe all the things he told me. It sounded like a blast. Now we dont have a Superbowl. Instead we have our Grey Cup. Its The Canadian Football Leagues 98th Grey Cup. And its being played here in Edmonton.
We all have little goals in life. One of mine was to own season tickets to a professional sporting team. A few years back, I went to an Edmonton Oliers vs L.A hockey game. I was so put out. It was my first and last hockey game. I couldnt go to the bathroom. Sorry you have to remain in your seat till commercial break. I couldnt go back to my seat till a commercial. It was like going on the biggest and best amusement park ride you could possibly imagine and then they strap in your legs/arms/shoulders and body to the seat so you cant move while on the ride. I haven gone to another game since. Nor will I.
Then a friend of mine took me to a football game. I had the time of my life. Everyone was having a great time. I didnt feel like I was in the presence of snobs. With the Grey Cup being held here this year, I wanted to be sure I was going and had awesome seats. As owning season tickets was a personal dream, I bought season tickets to the Edmonton Eskimos last year to guarantee my seats to the Grey Cup. And not just any seats...right on the aisle 4 rows down and not quite centre field. One section over. So Im on the 40. So this year I renewed my season tickets and bought the same seats for the Grey Cup. I also picked up 2 extra seats in the same place, just in the upper deck above me. So I have 4 Grey Cup tickets.
The first game is this weekend. Edmonton and Calgary...preseason. And Im back on the 40...Yeah Baby!!! We're going to the Grey Cup!!! BRING IT ON!!! Now all we gotta do is get the Eskimos into the final.
Saturday, June 5, 2010
4 Pc Mold Works Excellant

Centaur Field Medic. Thats him. There will be a few changes in the actual figures. Like I said, red resin will be layered in instead of painting and red clear holders and brain. So now its make a few figures and I can finally get the right Centaurus figures for my Chess Set.

What once was a saddle is now saddlebags. Nice and short so it doesnt hide the red stripe across the back. Its been quite the experience making the mold for the saddlebags. I'm very happy with my results.
Now its finished. I can make a few and then I can close the door on this project.
Wednesday, June 2, 2010
Do I need a Pressure Pot?
Do you need a pressure pot or vacuum chamber? Well ...that depends on how meticulous you are. In a perfect world, we all have vacuum chambers. Those cost money. So before we start shelling out money, lets look at what we want.
We want to cast. If you are looking at this as a way to make money, forget it. Its too labor intensive and time consuming to make a living at it this way. So for the most part, unless you are a perfectionist and even then...for basic home use...skip the vacuum chamber. I would have to say as a self proclaimed perfectionist that for what we are trying to achieve, the results we are after can be easily obtained using a basic pressure pot and compressor.
I bought a 10 liter (2.5 Gal) paint pot on sale for $70.00 Canadian. The compressor I salvaged. Now while I realize not everyone will have my luck, if you know what you want and are willing to hunt around, you can put this setup together for less than $200.00
IF you cant afford a pressure pot system, that doesnt mean you cant cast. It means you need to be efficient in managing your "casting time" and you will need to find alternative methods to disposing the air from your molds.
First, the mold. I would drop my silicon mold on the table right after pouring it. Only an inch or two. You just want to impact it enough to drive the air bubbles up. I would repeatedly hit the frame of the mold with the bottom of my screwdriver handle. I would take my exacto knife and actually 'cut' through the surface of the silicon to slice up any air bubles that were just below the surface. I would use pins to make sure the silicone got into every nook and cranny to help guarantee my mold wouldnt have air pockets in crucial places.
By doing those things, I was able to make some AWESOME casts. I made PEREFECT detailed Magno Chest Hilights and Missiles. Good enough that I said dam! and am using them proudly.
NOW..as for the casting...you really are at the mercy of the gods. You have to hope you made your mold in such a way (sprue or smuch) that resin got into every corner and that there will be no air bubles to mar the surface of the figure. Clear resin casting is out. Seriously. Dont try it. Ok...go ahead...but I warned you.
Clear resin casting WITHOUT a pressure pot wont work. You WILL get air bubbles and you will be upset. Doesnt matter what you try or dont try. They will appear. You are creating a chemical reaction. And they arent air bubbles that will interfere with the cast. Oh no. They arent empty spaces where resin should be. They are little air bubbles everywhere evenly placed throught the cast. That if you didnt see them, the cast would be perfect.
I thought like you. Oh yeah? I said...thats what YOU think. I can do it... And I tried. And then I tried again. Then I got one that was perfect. I was so happy I...oh wait...nope...I couldnt see them at first, then I turned the head in the light...TONS of little tiny bubbles. It was at this point I stopped casting till I had a pressure pot and an air compressor. But I wanted to make production quality style casts. And I was then able to do it with a pressur pot system.
If you just want to make some crafts for the kids, then I wouldnt even bother with the compressor system. If you just want to kill an afternoon with the kids or you want to make a few things for the church social, then forget the compressor.
Tuesday, May 18, 2010
Homeworld Remembers Bernice Lawrence
Today we take a step back from everything. Life has reared its ugly head and made itself known that there is a darker side lurking beneath a calm surface.
May 11/10, Bernice Lawrence passed away. A single mother of 3 beautiful girls, survived by her 2 daughters Dee and Tracy. A fighter of a woman with the heart of a tiger, who helped a niave young boy become the man he is today. She was both a friend and a mother to me. Recently I had the oppotunity to say goodbye to her...and I did. But I didnt know it was the last time I would ever see her. She was a good woman and I will miss her. But I will never forget her.
Dont put it off. If you have the chance to see some one and say hi...I was thinking of you...thank you for being you...do it. Because tomorrow may just be too late.
Wednesday, April 28, 2010
No More Color Chrome Magnos...For Now at Least


Man...thats a BIG BUMMER. :~(
Tuesday, April 6, 2010
Pressure Pot Modifications/Suggestions
The pressure pot I am currently using is an old paint pot. What I have done to ensure that it works properly is to use Teflon tape on the pot threads , I like the white tape. There are several types of teflon tape. Green/yellow etc. It depends on the usage. For my purposes the general all purpose white tape I find works the best. The second thing I have done is I use a chain wrench to tighten my pressure pot lid securely. Yes it has indents on the lid to grab, but I cant get a good enough grip without tilting the pot and putting it between my knees. Doing that just slopped my mold around inside. So having your paint pot secured is probably a good thing if you are using a modified design.
Friday, April 2, 2010
My First Pressurized Mold


WOW...what a finish. The top of the mold looks like a mirror and not a single air bubble can be seen. Compared to my old molds where you can see the air bubbles right below the sureface.
Im glad I stopped casting 4 months ago and waited till now. I'm looking at all the molds I have made so far without a pressure pot...as good as they are...OUCH...Im throwing them all away. I am going to try and find some kind of gasket material, maybe a mason jar something along that line. I dont mind babtsetting a leaking pressure pot right now, but I can tell it will get old real quick.

 Anyways, in these next 2 pictures, what I am trying to show is that while the texture of the silicone is somewhat rough, there are no air bubbles. Of particular interest is look how smooth the alignment holes are. I plan to take my time making the molds. Even if it means babysitting the pressure pot because of a slow leak. The results are so worth it. I can hardly wait to try out the clear resin to see how it will work. A Clear Centaurus. I can finally get my Chess set done.
Thursday, April 1, 2010
Modifying the Pressure Pot
A while back I talked about getting a pressure pot off ebay for roughly 10 bucks. I had planned on buying a bigger one, but it isnt in the cards till May or June. Enviromolds has a complete system for about $800 that is really quite good and reasonably priced.
So rather than get the new pressure pot now when I could least afford it, I opted for casting supplies and did a retro fit on the pressure pot I have. Its smaller than what I would like, but it works and is better than nothing. I just need a new lid gasket and 1 hose connector and Im ready to go.
 This pot is actually a painters pot. Meant to take the air out of paint. This one had a regulator on the outgoing line to govern the spray of the paint coming out. But the regulator isnt working and was in the wrong place for me anyway. So I bypassed it. I will work directly off the compressor. I removed the outgoing line and put in a plug. I kept the gauge as it was directly on the pot. Good. Right where I want it. I cut the brass tube that came out of the lid and ground it flush so it wouldnt interfere with anything I put in the pot. This tube sucked the paint out of the pot. Thats all. I then installed a make shift air fitting into the hose that came off the lid and goes to the compressor. I hooked that up to a shut off valve and then a quick change connector. This is the compressor I found in the garbage. It had a tag on it that said motor works, tank leaks. So I welded up the leak.
The pot leaked. I expected it to. It needs a new lid gasket. I inverted the gasket to the 'fresh' side and tightened the lid harder. It held. Im getting some new gasket tomorow.
So how do I tighten a pot lid tightly with my mold/resin inside without moving the pot so my casting isnt splashed on the insides of the pot? How do I hold onto it?
 I took a couple of 3" hose clamps and made 1 out of the 2. I did this because I didnt have a hose clamp big enough to do the job. So I made one with 2. I took some toolbox drawer liner and wrapped it around pot. I then put a 1/2" keystock along the side of the pot. I then tightened the hose clamps up and it holds not only the grip wrapping but also the keystock. Now I can hold onto the can. Now I can put the keystock in a vise to hold it still and then I can easily screw the lid on without moving the pot. I can now also lay the pot down sideways for longer molds. So the compressor and pressure pot cost me just under $20.00 The point being you dont need a designer setup and if you know what you are doing and looking for, you CAN do this on a shoestring budget.
It isnt the dream set up I wanted. But it works properly and thats all that matters. It will do what I need till I can get a bigger pot. At least I can do proper casting now. Tomorrow I am off to get some new gaskets and a proper hose fitting and will be casting up a storm this weekend. Centaurus will be my first project. I need to make some figures for my chess set to keep the color scheme intact.
So rather than get the new pressure pot now when I could least afford it, I opted for casting supplies and did a retro fit on the pressure pot I have. Its smaller than what I would like, but it works and is better than nothing. I just need a new lid gasket and 1 hose connector and Im ready to go.

The pot leaked. I expected it to. It needs a new lid gasket. I inverted the gasket to the 'fresh' side and tightened the lid harder. It held. Im getting some new gasket tomorow.
So how do I tighten a pot lid tightly with my mold/resin inside without moving the pot so my casting isnt splashed on the insides of the pot? How do I hold onto it?

It isnt the dream set up I wanted. But it works properly and thats all that matters. It will do what I need till I can get a bigger pot. At least I can do proper casting now. Tomorrow I am off to get some new gaskets and a proper hose fitting and will be casting up a storm this weekend. Centaurus will be my first project. I need to make some figures for my chess set to keep the color scheme intact.
Monday, March 15, 2010
The Dark Assasin

"Ward" is a Canadian living in Alberta. Being a serious Micronaut Collector who also resides in Alberta I have been asked several times if I knew of "Ward". I hadnt.

 "Ward" The Co-Creator of the Dark Assasin. The Ette figure I have is a shadow of the original which was originally a magno figure which utilized magnets and balls for all the joints. So for the next 2 and a half hours we sat and talked about Micronauts and compared notes on casting.
At one point in the conversation I was acutely aware that the conversations at the other tables had stopped and that there were 3 or 4 people staring directly at me. I was not sure why, but I was aware of this. I tried to act normal even tho I was somewhat perturbed. It wasnt until later on when I had gone home did I realize what had happened. And my apologies to the 2 women seated directly beside me who were obviously put out.
Imagine that this is the only part of the conversation you hear...Wow man. How did you do that? I had to cut the wrists right off.
He is extremely intelligent and has some very well thought out ideas. I'm hoping to team up and hopefully we will be able to make something in the near future.
Friday, February 26, 2010
BUG
Probably the coolest of all the Micronauts...Bug. But Bug lives on...on paper only.
Bug was created by Marvel for the Marvel Comics edition of The Micronauts. And Marvel was holding onto this one. So there are no BUG action figures. Marvel Comics did a 48 page Comic called Bug One SHOT and I think there might be a 4 comic mini series...hmmm...those comics are packed one the top shelf in the back...crap...

And then as stated, there have been various 'custom' BUGs. I have 3 of my own version made from leftover antron/repto parts, but they are pretty lame. And while I have seen some very good custom BUG figures, the best 'BUG' custom I have ever laid eyes on is the one built by Vince Garma.

To date I am unaware of any 'official' Bug figures. They would of course be Marvel figures if they were.
Saturday, February 13, 2010
El Greco Super Commander
The Micronauts. The most successful failure in the history of action figures. I dont think any other toy line has had so many different companies produce so many different versions. Takara/Mego/HourToy/Airfix/GiG/El Greco have all made their contributions with most notably El Greco being the most elusive.
All this...this entire collection is made available because of one reason only. The internet. I dont know how I would have found out about these, let alone bought them with out the internet...
 Yes...Homeworld is proud to present the fabled Greek Magno...Super Commander. This Super Commander is one of 3 I have ever seen. I own it. I have only ever seen Santana/King Atlas and Baron Karza twice. The Emperor once. Oddly, the Green Baron was renamed Santana and the others left untouched. Curious.
Currently, the other Greek Magno figures while not in my possesion have been secured and I expect to be showcasing them sometime in May. I dont believe in showcasing something I dont have. While I do have photos of the other Greek Magnos, they are not my pictures and I have not asked for permission to use them. They are stolen from Ebay, so I dont feel right posting them to my blog.
 Besides the packaging the most notable difference would be the lance style sword that all the Greek Magnos come equipped with and not 1 set...not 2 sets...but can you believe...4 sets of fists. These Magno figures also cames with their respective steeds.
Click on photos to enlarge.
There were 13 figures I was left looking for. I didnt include the Greek Magnos in these because I never thought I would see them again as thats how rare they are. There are also the extremely rare and mysterious Cavelari Stellari figures. There are 6...I have 1. Those will probably be the hardest to get, if not dam near impossible. Those 5 are part of my final 13 figures. And most likely will become the final 5.
All this...this entire collection is made available because of one reason only. The internet. I dont know how I would have found out about these, let alone bought them with out the internet...

Currently, the other Greek Magno figures while not in my possesion have been secured and I expect to be showcasing them sometime in May. I dont believe in showcasing something I dont have. While I do have photos of the other Greek Magnos, they are not my pictures and I have not asked for permission to use them. They are stolen from Ebay, so I dont feel right posting them to my blog.

Click on photos to enlarge.
There were 13 figures I was left looking for. I didnt include the Greek Magnos in these because I never thought I would see them again as thats how rare they are. There are also the extremely rare and mysterious Cavelari Stellari figures. There are 6...I have 1. Those will probably be the hardest to get, if not dam near impossible. Those 5 are part of my final 13 figures. And most likely will become the final 5.
Subscribe to:
Posts (Atom)