Friday, December 27, 2013

Working the Properties of the Mold

When I first got into casting I basically followed factory guidelines.  A mold contains 2 halves. But those are steel injection molds.  As my experience has progressed, I have found that maintaining a 50/50 mold split is making for ALOT of extra work because of where the cast line ends up.

We all know how much I hate cast lines.  With steel the molds are unforgiving so it has to be a 50/50 split.  We are using silicone.  which is flexible.  We can bend and stretch the mold carefully to remove pieces from the mold that would be impossible with steel.  Not only that, by varying the surface contour, we are helping to ensure positive alignment of the mold halves.

These following pictures are the new molds for Homeworlds upcoming Anniversary Edition Crystal Roboid.

This is a sprue mold.  The left side would be the bottom of the mold.  By being able to bend the mold to aid in the release of the cast piece, I can now cast the holes in the boots so I dont have to manually drill them.  I have moved the Mold break line so that it falls on the edges of piece instead of in the middle of the detail.  So Detail is no longer affected by sanding.  This is HUGE news for me.


Here's a shot of the mating part of the mold.  At the top of the mold you see a small channel and at the bottom you see both the vent and spout.  We could not do this if these were steel molds


The unconventional mold split also helps to guarantee a perfect mold alignment along with the locators.

Im looking forward to doing this more and more.

Monday, October 7, 2013

MIX WELL...ALWAYS!!!

One thing you will keep hearing at Homeworld is MIX WELL.  First off, I do not use sub standard products for any project.  ALL of Homeworlds Blog Exclusive's are made with fresh stock.  Whats left over I use for customs and commissions.  And then I experiment and have fun with whats left.  Sometimes I dont use it all and I might have 1/4 of a bottle left sitting for a month or two.

Here's what they DONT tell you about the shelf life of a product.  The SHELF LIFE  of a product is directly linked to the AMOUNT LEFT IN THE BOTTLE.   If you have two bottles of the same product one 1/4 full and one that is 3/4's full...the one that is 3/4's full will have a longer shelf life.

I always say that 90% of casting/molding issues can be traced back to ineffective or improper mixing.  I recently found a bottle of the reacting agent for the silicone molds I had forgotten about 3 months ago that was almost 1/3 full.  It was worse than molasses.  Now if I didnt have the pressure pot I wouldnt have tried this because the pressure pot helps force the silicone.  But before I throw something away, I want to be sure its garbage.  This was the perfect opportunity to experiment with.  LETS SEE WHAT THESE PRODUCTS CAN DO!

And I mixed the shit shit out of it.   It looked like it was half cured already.  And I mixed it first in its container by itself and then I mixed it with part B and mixed the shit out of it some more and globbed the silicone into the frame and threw it into the pressure pot. 

I dont care what the outside of the mold looks like.  Just whether or not it made a good mold internally.  And it worked beautifully.  Unfortunately I dont have any pictures just yet...but it proved to me once and for all that mixing is the most important part of casting.

Saturday, September 21, 2013

Big Man Toys

I missed the last run at Big Man Toys.  Lee was nice enough to run 1 last cast for me.  BMT in league with Creative Consultant Bryan Wilkinson have created a new figure based on parts from the Micronauts Battle Cruiser.


My ONLY complaint...it isnt articulated.  But Im working on that.  :-)  This is an incredible little guy about 2 1/2".  I asked Lee to send me one right out of the mold.  I suddenly have an urge to paint.  me.  Yes.  You heard that.  I want to paint this guy.  Although I am not sure if I am going to go with the Cosmic Attack Cruiser or the Transfer Fortress colors.  Black and gold doesnt seem to bad either. 
I spent the morning sanding.  Unfortunately I had to sand some detail away, but it still looks great.  Im hoping to paint it tomorrow in between molds.

Saturday, August 10, 2013

Micronauts Museum Issue

While I am slowly getting rid of my entire Toy Collection, Comics were always my first passion.  I have a few hundred of various titles and a few undergrounds as well. I have most of the Micronauts and All the variant covers.  I will always buy comics.

I have never been an advocate for AFA grading.  Buying something that was AFA graded seemed a waste of either a figure or a comic to me because you need to hold it and or play with it/read it to appreciate it.  Thats my belief.

However I believe I found an exception to my rule.  Like I always say, If you dont ask, you'll never know.  I recently submitted an offer for this next item and was quite surprised to find it was accepted.  Since I have read and have other variations of this comic, and others can easily be found, there is no reason to NOT have this particular item AFA Graded.  Its sealed as it is.

Tuesday, May 14, 2013

Micronauts Sleeping Bag

There has been some interest in my Micronaut Sleeping bag.  I have been working quite a bit and havent been able to make a complete list of items for sale.  Im caught between final touches on Sultan and working ot.  Sorry.

The Micronauts Sleeping bag I bought back about 12 years ago.  I was dirt broke and unemployed when I bought it.  At the time it was THE most expensive item I had ever bought.  Factoring in the currency exchange rate, I paid almost $400 for it at the time.  It was my very 1st unique item I ever purchased for my collection.  Im not sure if I am ready to sell it. 

Sultan is too much of a distraction right now.  I'll try to get that for sale list done asap.

Sunday, March 24, 2013

Area 51 Airfix Micronauts


 Back in December of 1998, a Sci-Fi collecting magazine called AREA 51, did a 6 page article on the Airfix Micronauts.
 A quick read reveals standard facts about Micronauts history going back to the Henshin Cyborgs then how Takara expanded to the 3 3/4" format with the 5mm peg system.  There is a brief mention of a child choking incident 'outside' of MEGO products that says MEGO voluntarily began making the firing systems less functional.


Not having an Ampzilla, I cant confirm or deny this, but it mentions that Ampzilla is a 'MOTORIZED' vehicle.  I have never heard of them being motorized, but hey...I thought the Sharkos had a die cast body until I recently bought one.

But one fact about this article that is incredibly wrong is that it says Centaurus, Kronos and Lobros ( Page 23 under 1981 Decline and Fall)   WERE NEVER RELEASED in the USA appearing only in Italy.

I can totally destroy that.  In 2006 I sold a US version Lobstros and currently have the US versions of 5 of the 6 Micronaut Aliens MOSC displayed on my wall.  I dont have a US version Kronos, but know for a fact one exists.  I missed out buying it.  You can see the "I" in front of the word Micronauti on the Kronos card to the right along with the Italian writing underneath the figure name compared to the US cards which have Simply Micronaut and then English writing under the figure name.

There is also a quick mention on Transformers.  Now this is just a quick read while I sit here writing this.  But I found enough contradictory information in the article that warrants me to read the entire article thoroughly.  If for no other reason than to verify specific facts.

Saturday, March 23, 2013

Newest Micronaut...SHARKOS

I have rearranged my Micronaut shelf.  Other than a few Interchangeables and my Magnos, this is pretty much all I have kept for Micronauts figures besides my customs.  Whatever isnt in this picture is for sale.

But my SHARKOS has arrived.  For years( DONT LAUGH TOO HARD) I was under the impression that the Sharkos had a die cast body.  I thought...what a useless toy.  To give it an aquatic theme and then put a die cast body on it is a disaster.  I never asked.  People's opinions on it varied. Some liked it, others didnt.

 Recently I put a shit n giggles bid on a Sharkos on Ebay.  Only because it was 100% complete with box inserts as well.  I fully expected to get outbid.  But I didnt.  So now I own a Sharkos.  After buying one, I have a little more respect for the toy and am a bit choked at myself for not researching this vehicle.  Had I,  I most likely would have bought this vehicle years ago.


I am trying like heck to get caught up on alot of posting I havent been doing so this picture of the new shelf will have to do for now.  I'll dissect the Sharkos more in a future post.

Thursday, January 31, 2013

How To Tighten Rivets At Home

You dont buy a tool unless you plan to use it.  Or unless you are like me and simply buy tools because you never know when you'll need it.  I have tools I have only used once in 10 or 20 years even. But the moment I get rid of the tool...I'll need it.

For me a Hand Squeeze Riveter was a no brainer.  For some people its an unjustified expense.  And its not cheap.  So I set to finding the easiest and cheapest way for everyone to save tighten their figures.  I tried several methods.  Made different tools and it doesnt get any easier/cheaper than this.

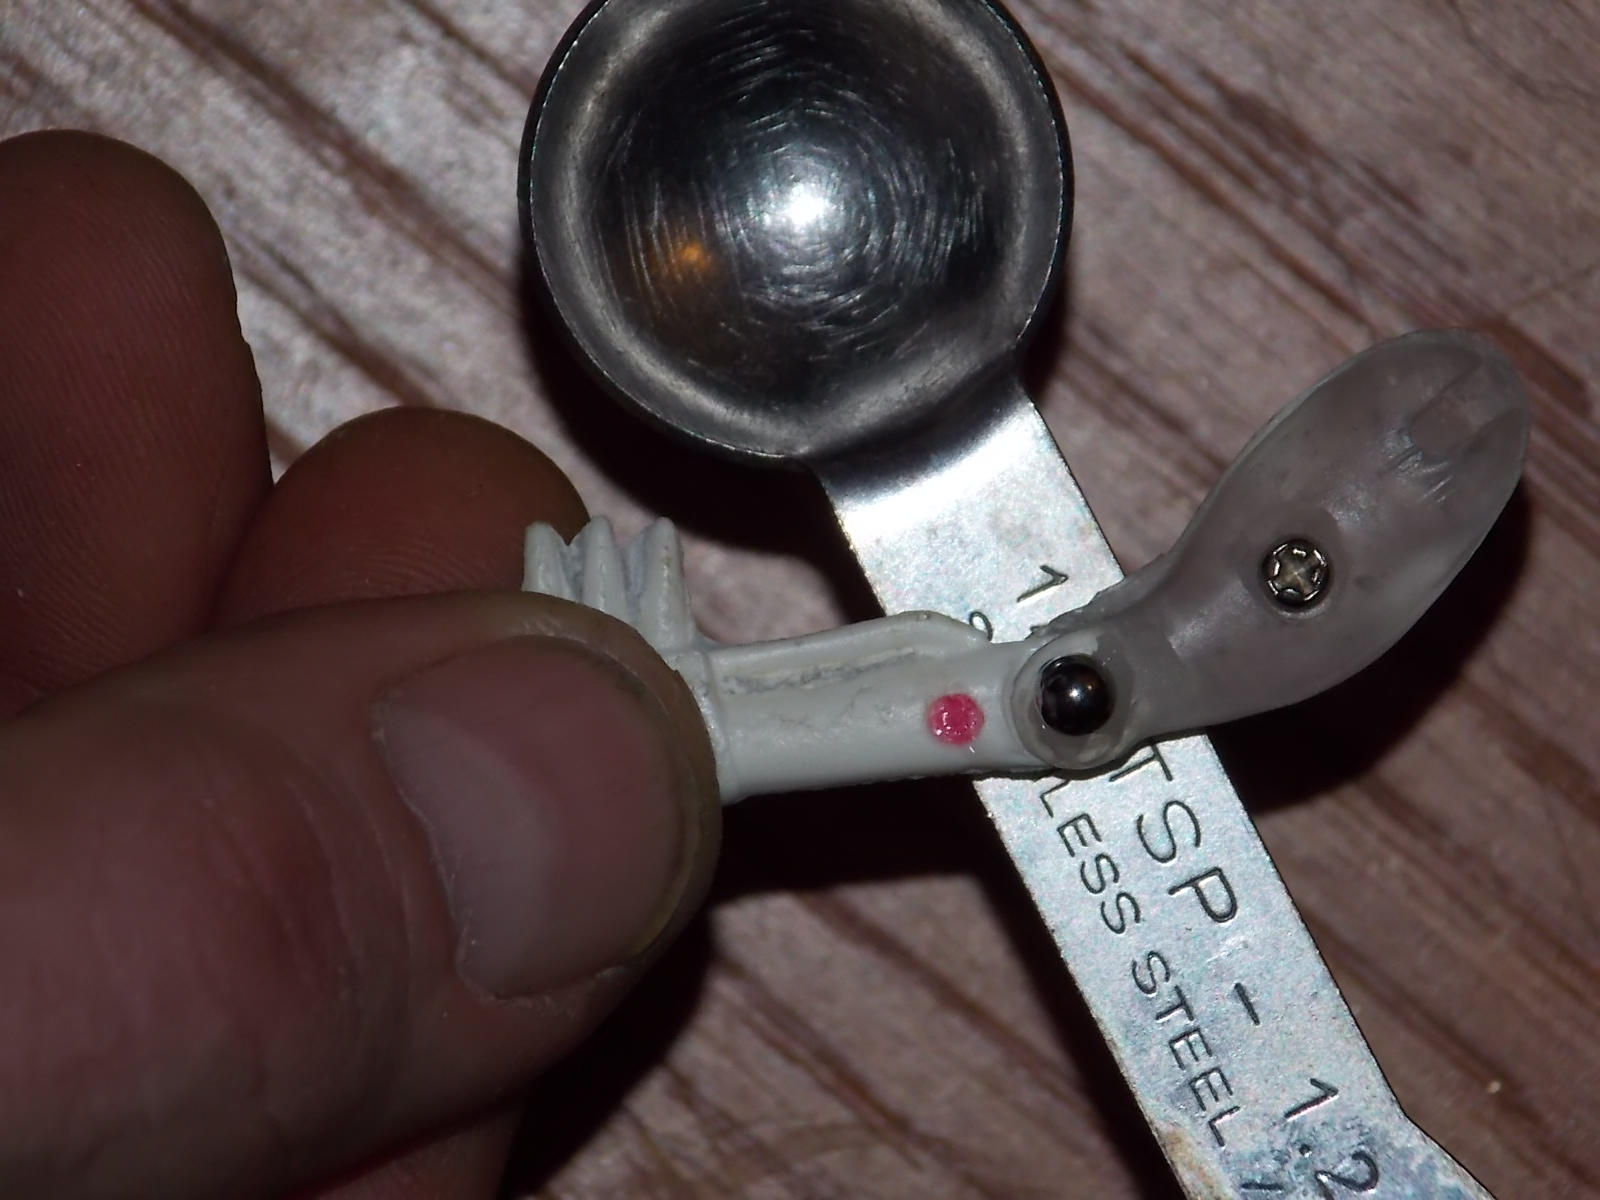
Tools:  1 small Ball Bearing.  A standard BB will do.
            A small flat piece of steel.  A butter knife/table knife/steak knife
            Butter/grease/honey or something similar.
            I medium set of Pliers
            1 vise

Directions:  Put a dab of butter/grease or whatever you use in the CRUSHED end of the rivet.  Place the ball bearing on the crushed end of the rivet and lightly press down to seat the bearing on the rivet.  The butter helps keep the ball bearing from falling out.
               
 Place you knife of choice or any other thin flat piece of metal you have in the vise. I used my measuring spoon.  Place the limb you wish to rivet,  with the head of the rivet upon the flat surface of your knife blade.  The ball bearing should be on top.  The vise is used to hold the steel to free up your hands and make it less awkward.  More talented people might be able to get away without one.  I have a vise.  So I use it.
                 
Using Pliers gently squeeze ball bearing and bottom of the flat piece of steel of your choice.  Squeeze.  Just a little.  Dont overdo it.  You need to get the feel of how much pressure you need to apply.  Just squeeze a little bit and then check the movement.   If its not enough, you can always squeeze it again.  If you over squeeze you cant loosen the rivet.  You would have to drill out the rivet and start over. The flat steel protects the head of the rivet from getting marked up by the pliers and the ball bearing does the same on the crushed side as well as it provides even pressure on the rivet. 

Test Tightness.  Repeat if necessary.  Wipe of the butter and play.  :-)

Riveting Knee Joints on 3 3/4" Micronauts

I use rivets.  I like them.  They strength the figure.  Plastic pins wear and/or break.  Have a floppy leg Antron?  Or a Repto?  Thank goodness for the tail.  You can either find a parts lot and replace the parts and hope the ones you get are tighter or will be tighter when you put everything together.  Or you can drill them out and install rivets.  It Can be done but its a last resort. 

After 35 years the plastic is brittle and even manually drilling with my fingers spinning the drill bit...There is no rhyme or reason.  It either works or it shatters.  Once the hole is drilled, putting a rivet in isnt a problem.  But the drilling is. 

As a last resort if you have some spare legs  to work with its actually worth it to try.  It strengthens the figure like you wouldnt believe.  I have a vintage Centaurus I did it to.  I shattered 2 or 3 legs trying to drill it, but once it was drilled, she went together pretty good and is nice and firm.  And since we are all accustomed to rivets in the arms/shoulders of our Microman figures, you actually dont even notice the rivets are there.


And considering how rigid this figure is now, I would rather have the rivets than not.

For those IN CANADA considering a Squeeze Riveter I...I cant believe I am saying this...Check Ebay first. 

I went to several tool outlets and was informed at every one it would be 2-3 weeks for them to order it and the bill would have been between $250-$350.  They had to order it.  Order it? From where?  From the US.  Well shit I can do that myself.  So I found a decent squeeze riveter for around $90 or $100 on ebay and after shipping/customs I saved at least $100.

Im not sure what US tool suppliers would charge, so for US residents you might want to check with a supplier first before hitting Ebay.

Saturday, January 19, 2013

Assemble Borg Bike

While I am a stickler for detail, when it comes to fines details like names and stats, Im not your guy.  Some times I can remember them, most times not.  away, and while I am nursing a sore thumb and a gashed finger I thought since I cant work on figures right now I could at least put up some new pics.

Here's an Assemble Borg Bike I recently picked up.  I would hate to get anything more complicated as this is quite the thing to put together if you arent used to doing such things.


But I did find that the Microman Magne Force Figures fit it quite nicely.  And the color matches this guy too, so the Magneto Mobile is now in need of a driver.

Acroyear Metis just got a new ride.