Showing posts with label Tools. Show all posts

Sunday, February 26, 2017

My Best Tools

My best tools...are my files.  I don't use sandpaper of any kind nor do I use Acetone.  No chemicals of any kind are used in the finishing process except for whats in the clear coat.

Besides my pocket knifes, my files are my best friends.  Sandpaper will crease where you bend it.  the paper will crack and the grit will fall off where it is bent.  So the edge of the paper really has zero effect.

As a machinist, I deal with metal.  1st year apprenticeship entailed making a static cannon on a base plate.  All bevels were made with a file using a process called draw filing.  the base plate had a 45 degree 1/8" wide bevel which was all done by hand.  Files have hard edges so I can file right up to a corner and come in various shapes and sizes.  Some I have modified for my own purposes.

 So the use of files works perfectly for me.  Plastic is no different than steel except its softer.

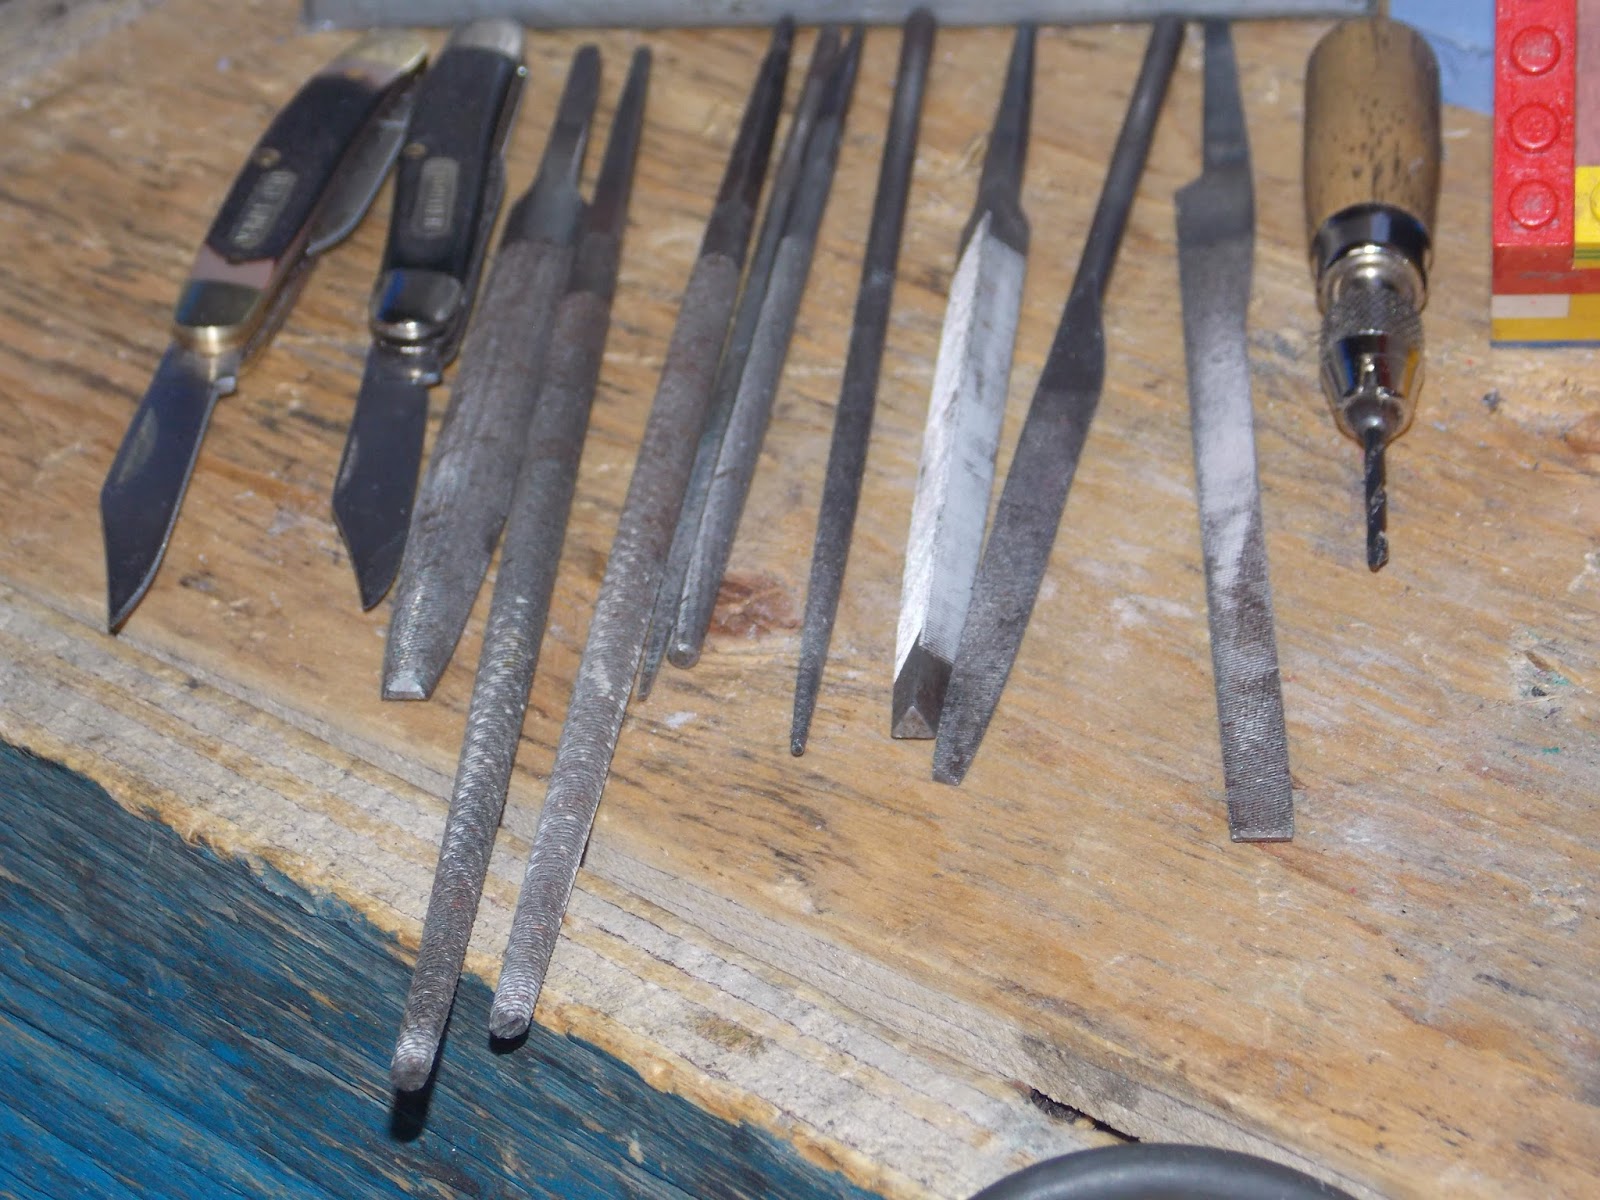
 Here's my selection of files.  This is everything I use to sand my products.   When done, they re washed in a non abrasive mild sap and cold water with a well used steel scrubby.  They are then riveted, painted where necessary and clear coated.

These files are round, square and flat for the various jobs required of them.

Saturday, May 21, 2016

New 'Toys'

Yes its junk...but for $4.00 and free shipping I cant say no.  I cant make it for this cheap.  It costs the company $5.50 every time I take a dump.

But for plastics these tools work great and will save the palms of my hand from getting hole in it by spinning drill bits in my hand.

Each "Holder" or pin vise holds a collet at each end.  The collets are also double ended with different size ends to hold various size drill bits from around .090" and under.  PERFECT!  The pilot hole is the worst one to drill by hand.

I also have a small jewellers drill coming any day now as well.  Simply push down and it spins the drill. 

Thursday, December 29, 2011

OOMOO 25 VS OOMOO 30

I have discussed this once before, but I think it needs refreshing.

I use Smooth On products.  Its all I have ever tried.  Having a distributor 10 minutes away makes it that much more attractive.

The Smooth On Starter Kit comes with OOMOO 30.  This is a medium setting Silicone.  It has a 7-9 minute pot life and cures in roughly 6 hours.  This is what I use the most.

OOMOO 25 is a much faster setting Silicone.  It has a pot life of 2-3 minutes and cures in roughly 2-3 hours.  It says 90 minutes, but its still tacky after 90 so I leave it a few more hours.  The benefit of using the OOMOO 25 is that it is a quick setting silicone.  I use it for what I call Stage Molds.  Stage molds are basically one time use molds.  You make the piece in stages.  You make a mold of a built up area then carve/sculpt it.  Then you make another mold of the sculpted piece and either use that or rework the piece some more.  Its like saving your work in case you slip with a knife or cut too much off in one area.  Thats why I use it.

Its also good if you are making only 1 or 2 small molds.  Remember you have to mix it and pour in under 3 minutes.  Proper pouring procedure of silicone is a nice, SLOW steady stream to help break up air bubbles introduced while mixing.  Plus you need to get it into the pressure pot.   If you are mixing alot of product or have several molds to pour, I dont recommend using the OOMOO 25.

I prefer the OOMOO 30 except for the 6 hours cure time.  But thats the time it seems to take for a good solid mold so I live with it.  I like the detail the OOMOO 30 provides over the OOMOO 25.  Because it has a longer pot life it doesnt thicken up as quick.  So I can pour several molds properly without fear of the silicone curing before I can get it into the pressure pot.  Also, because it stays in liquid form longer, it can get into all the little tighter areas nicer and cleaner.

Thursday, December 22, 2011

A New Stack

Stack...thats just what I call it.  I guess in retrospect rack would work just as well.  But it just seems more apt.  I dont know if anyone else thought of this.  Most likely.  Its a simple enough idea.  I remember documenting it here on the blog when I first made it.

When I first started casting, I was using a very small pressure pot.  In fact it was a paint pot.  I had to turn it on its side to be able to make the larger molds. I could barley get my hand in and sometimes it was sloppy.  So I was pretty happy when I found the one I am using on sale for $70.00.  But it is deeper than it is wide.  And that made for alot of empty space.  So I made a small shelfing (apparently thats not a word...hmmm) system. 

I cut 3 pieces of thin paneling.  I put one on the bottom of the pot, because the pot is curved.  Then I took the other 2 and drilled some holes, used some All Thread and a few nuts/washers and made a the shelf unit to fit inside the pressure pot.  Now I could make more molds at once.  At the very least, I didnt have to keep reaching all the way into the bottom of the pressure pot. 


 It wasnt until I used it a few times that I realized I made 1 small error.  Resin sticks badly to the wood.  So the shelf unit got bumpy and uneven from spilled resin.  I had to grind it off which is alot of work/noisy and messy.  However it can be easily scraped off with a putty knife or a simple scraper were it made of acrylic or some type of plastic.

So I finally got around to making the new shelf unit.  I kinda like the look.


I had some square pieces.  I just took a grinder to the excess and than spun it by hand over a belt sander.  I still have to put some pads on the bottom of the all thread so it doesnt damage the bottom acrylic plate.

Saturday, August 13, 2011

Do I Need A Pressure Pot?

Do you really need a pressure pot or a vacuum chamber to cast?

That would depend on alot of different factors.  What are you trying to make?  How much detail is involved? Will a few air bubbles bother you?  How picky are you?

The vacuum chamber is used primarily to ensure a good mold.  It works on the premise of vacuuming out all the air. Vacuum chambers are an expensive method.  The best method, but expensive.  A pressure pot works by pressuring up.  You essentially compress the air molecules so that they are so small they cannot be seen.  This is the method I use.  I am quite picky and this method works exceedling well in my opinion.

Before I got a pressure pot, I did make some molds that were quite detailed.  But that required a lot of work.  I had to use a silicone with a long pot life.  I would lift and drop the molds on the table from a few inches up.  I would take needles and use them to poke the silicone into tight crevices.  I would use my exacto knife and lightly drag it through the silicone after it was poured to break up air bubbles.  And by doing all these things, I was able to make some very good non pressurized molds.  But I couldnt do any real casting with clear resins.  They always had air bubbles no matter what and it bugged me. 

The pressure pot helps give me for the most part a very good cast.  There is always 1 or 2 casts that dont turn out.  Roboid was made with pressurized molds and casts.  The pressure pot helps to give good clear casts and it also helps to PUSH the silicone into very tight spaces that simple gravity can't.

First and foremost, your mold is only going to be as good as the effort you put into it.  Pouring the silicone is the easy part.  Setting up the piece to be cast is where it makes or breaks you.   Its always a pain for me to make a mold, because I want a good cast.  So I take my time.  I use a knife to push the clay in and around the piece to be cast.  I use light brushes to clean it before making the mold.  A friend gave me a halogen magnifying lamp which really helps.  But it generally takes me quiet a few hours to prep a piece.

I am making clear Membros weapons for my chess set.  These are the molds for them.  I like to drill my own holes but decided this time not to.  The Hydralaser has a small hole where the hydrapipe fits in.  If you zoom in you can see that the pressure pushes the silicone into this hole.  Its in the right side of the left half of the mold.  Without a pressure pot, Roboid would not have been possible.  The clear chest canopy was made using a pressure pot.  This gave me an almost perfect mold that even replicated the threads so it could be screwed together.

Do you need a pressure pot?  Again it depends upon what you are casting.  But for clear resins, better molds and better casts.  I would recommend using one.  You dont however necessarily need a vacuum chamber.  The cost/quality ratio is too high for virtually the same quality product.
Monday, July 19, 2010

Tools

What Tools do I use?  The tools I use for casting are quite simple and very cheap.  Most of the stuff I have, I have bought at the Dollar Store.  From exacto knives and blades to gloves and mixing sticks.  But there is always one specialty tool.  And there is here too.  Or at least there is for me.   Yed Micronauts are based on a 5 mm system.  But sometimes there are slight deviations.  Most normally a 3 % shrinkage rate.  I drill all my own holes as opposed to casting them with the exception of the little alignment pins in the torsos.  And I do  this manually.  It get hard if you make to big a hole at once.  So I do it slowly.  I start with a drill thats about .040"  in diameter and worm my way up a few number drill sizes at a time till the hole fits whatever it fits.  I would end up drilling the hole about 30 times or so.  Im wearing half gloves with a leather palm and no fingertips and my fingertips are very sore.  And when I use the smaller drill bits, they used to drill backwards into my palm because they were so small.   I have about 10 of the holes still in my palm.  lol

Dollar short and a Day late.  So I just came home from searching the town.   Mr.  Schultz  showed me exactly what I was looking for.    And I had something.  A ratchet style small tap handle.  Except it couldnt handle drill bits under .125"   I finally found whatI was looking for.  To help me drill my holes and still retain feeling in my fingers.   And its called a jewelers drill.  Various makes and models and sizes I suppose from what I saw.   Capable of holding even a .010" drill bit.  So I was sold.   However I had to haul my ass out of the hobby store real quick when I saw their Hot  Wheels display.  Hot Wheels is now making Monter Bikes...SUHWEET!   

Anyways here is one rendition of this jewellers drill that is a virtual godsend to me.  $13.00  You can get various handles.  Im going to  see how this one feels.  I can always machine down the handle ball.