As stated many times, unless absolutely necessary, I hate painting. So if I can, I will double pour. Double pour is a term given to using multiple pours of resin, usually tinted to make a cast.
To do this, you have to work from the outside in. You do the outside detail before you do the main body of the cast.
Im not to sure how to describe this process. Each piece of the mold needs to hold part of the next piece of the mold it is attached to. So the parts of the mold need to be interlocking.
This project was my first figure. Chiron, who ironically has a Canadian history along with a base history of knowledge including medicine.
 |
| CHIRON |
Double pours were able to be done in the standard smush molds use for this figure. Colored drops of red resin were dropped into the appropriate places in the mold using a pin. The parts were then pressurized and allowed to cure. Then the white resin was added to the mold cavities and everything was pressurized again. This is the end result. Below are the parts of the Interlocking 4 pc mold. By Interlocking, I mean the mold has both a male and a female alignment pin.
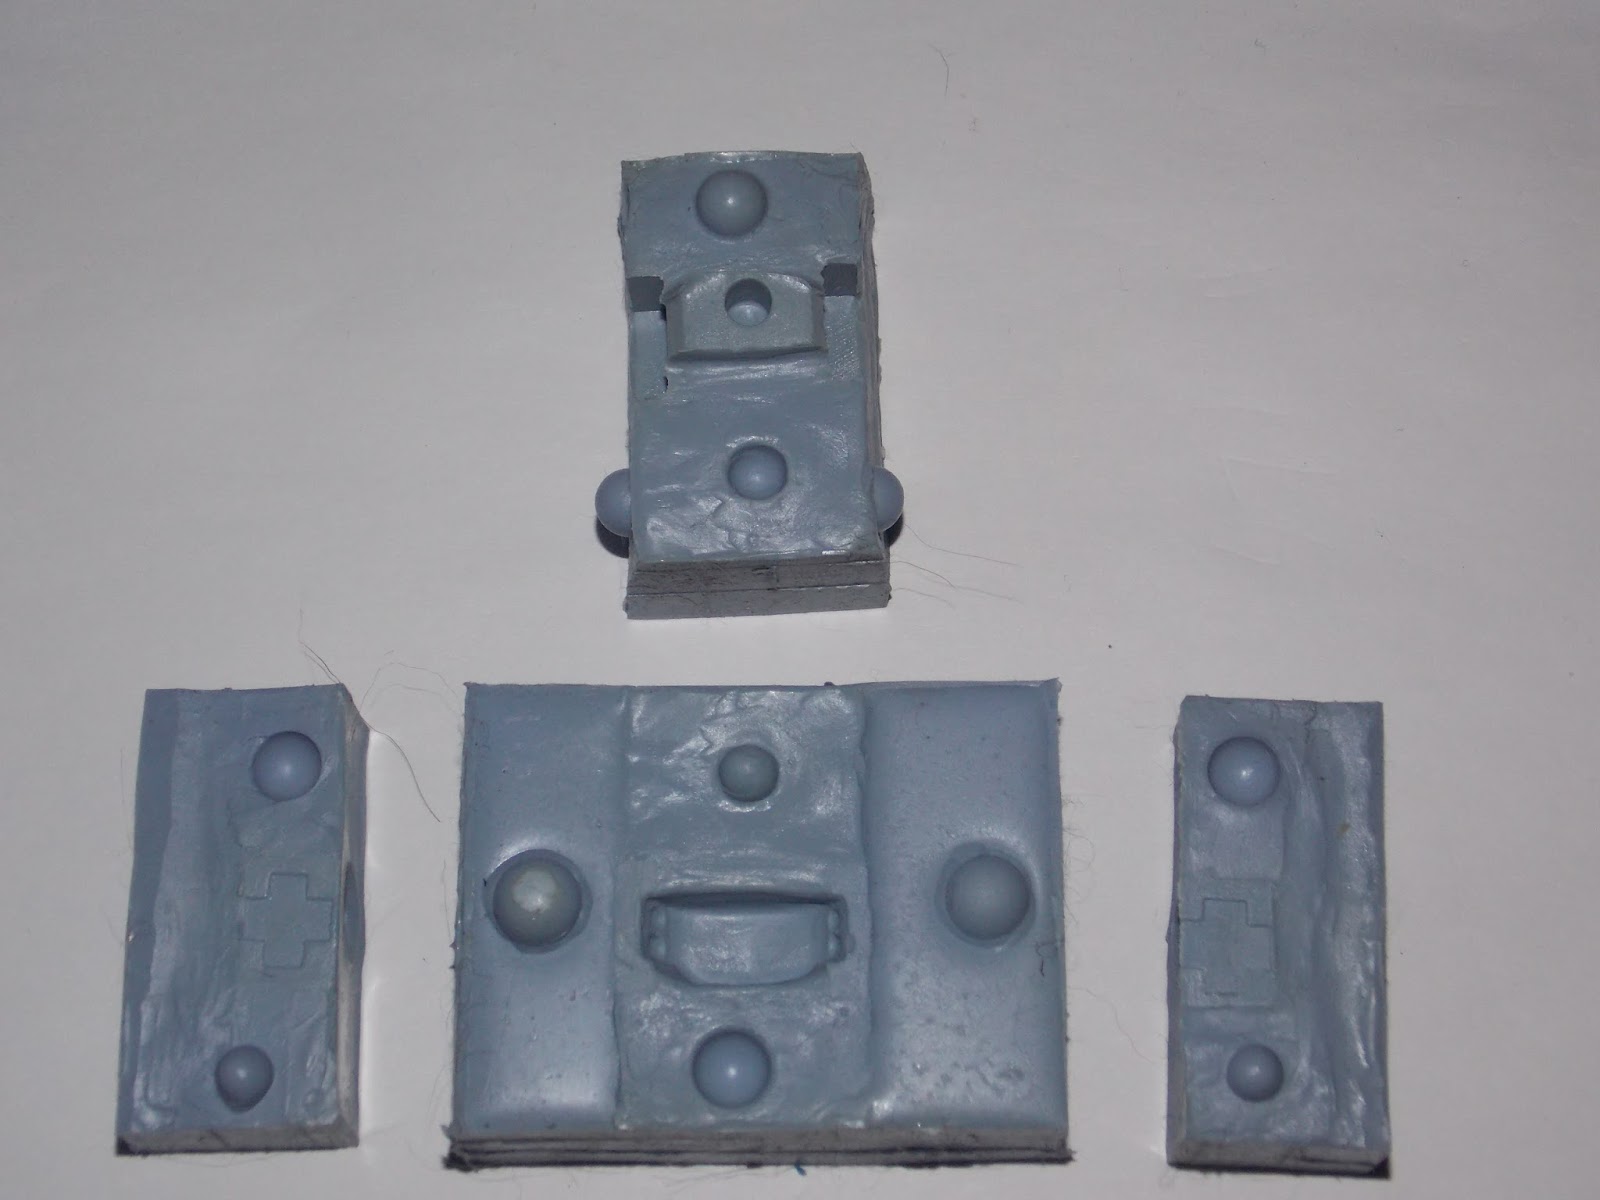
In the above picture, the red resin would be laid in the far left and right mold parts. This will make the red cross. In the center mold, the mold would be tipped so the red resin can be cured in the divots that will make the red dots in the saddle. This took 2 applications. One for each side. After the red resin has been poured/cured, the white resin can then be poured.
When doing the initial pour, you must be VERY careful to not overfill the cavity you are filling.
Conversely, once you have cured the initial pour, it is very critical you not flex the mold in any way that could lift these initial pours from the mold. OTHERWISE...what happens is when you pour the bulk resin, it will get underneath the initial pour. You will have to scrape away the 2nd pour to uncover the 1st pour. Unfortunately at the time I didn't realize the importance of "FAIL" pictures.


And finally...the finished saddle. After the red was poured/pressurized/cured, the white resin was poured and processes were repeated.
PLEASE...If I have been unclear in anyway or you feel I could make this easier to understand, please send me an email. I read all mail and strive for user friendly instructions. Your feedback is highly appreciated.
One last thing...when dealing in clear colors and double pouring, colors will change. if you have a clear red over a blue, it wont look like it. Double pours I would recommend limiting to solid colors. But the best results are found during experimenting. :-)
No comments:
Post a Comment