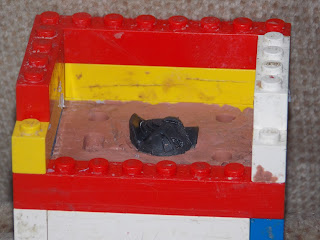
You actually have to answer a few other questions. First you need to determine the orientation. Orientation may also determine what type of mold you want to use. Today we're going to talk SMUSH molds. We'll talk about Sprue molds later.
These are all just my opinions based on my results. You may not need to do some of the things I do based on what you are casting.
One of the benefits of silicone molds is we can put the mold split where ever we want. Im lazy. And I want to do as little sanding as possible. So when I make a SMUSH mold, I like to "Bury" the master so that 1/2 of the mold is more of a lid. This then puts the mold split on a corner. So then if there is any sanding its very little and wont affect the detail.
I also don't like to put a mold split on a peg, or a hole or where a size is critical or concentricity needs to be maintained. I avoid putting mold splits in those areas.
Here's an example of this. The Sultan mold for the head.
Notice how one half of the mold the one on the left is more of a lid. The other half (on the right) is more of a cup. Also the head peg is fully contained. So any sanding is all along the edges of the cast, the peg is fully concentric and true to the master and we can bend the silicone enough to remove the cast without damaging the mold.
You need to be sure this peg hole gets resin in it and I like to use a pin to smear it around and make sure the sides are at least coated. Im being picky, but there is a science behind this. Things like cohesion and adhesion are simple science concepts but they can wreak havoc on your casts.
Here's another example using the Jade head. It still needs to be washed before I pour the silicone. I threw it quickly together for this post.
Notice the mold split is in areas easily sanded with the least effect on detail as well as the fact the peg is completed buried in the clay. Whatever is clay will be replaced by silicone when we make the second half of the mold.
The next thing is you want hard lines and corners. You don't want to press the master into the clay. You want the master to be held tightly in the silicone. If the clay holds the master too tightly you risk pulling the master out of the silicone before you get a chance to make the second half of the mold. This can sometimes cause problems. If the master doesn't seat properly you will get an air pocket and a deformed/thicker cast than you want.
This next bed took me a few hours to make.
Remember years ago I said my pocket knife was my favorite tool? Well I use my pocketknife to cut hard clean lines around the master. This makes for clean edges. Less flashing and most importantly, less sanding. I used the tip of the knife to pack clay around and into the corners to give me hard lines. its easier to do now that try and manipulate cured silicone. Remember...this is the most crucial part of the mold process. What you do here determines how much or how little work you will be doing later on. Here is not the place to take shortcuts. Take your time. Do a good job and you'll be rewarded and thankful later on.


No comments:
Post a Comment